The HX1 Cloud is now retired. If you have saved data to your PC previously you can move forward to Step 2: Uploading Files to the New Cloud.
In this article we will show you how to save and transfer your data from the HX1 to your PC or to the new Hema Cloud.
Step 1: Downloading GPX files from the cloud
The HX1 cloud is now retired. You will not be able to access the files anymore.
After you have finished a data sync we will go to the Hema HX1 Cloud website.
We recommend using Firefox as a internet browser for this as Chrome and Edge no longer support the maps – so you cannot view them. You can still use Chrome or Edge, however they just will not show you where your records are on a map.
EG:
Firefox Chrome
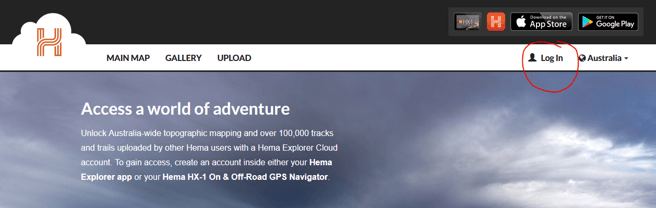
Open Firefox and then type in cloud.hemaexplorer.com in the address bar.
Sign in with the same email and password as you used for your HX1.
If you have already been using your HX1 in conjunction with the cloud you will know that you will have stored in your account:
Tracks, Routes, Waypoints, Maps and Folders.
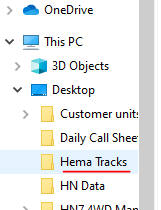
To prepare to save some of this data, lets make a folder on the PC to transfer this to.
On the Desktop of your computer, right click on your mouse and hover over "New", then "Folder".
Give the folder a name such as Hema Tracks.

Ok so now we are ready to start downloading our data.
Let’s look at how to download a track first:
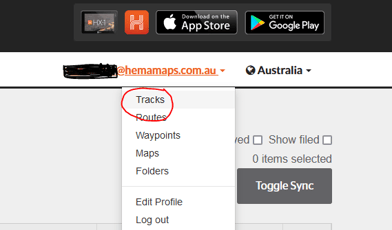
Go to your account name and click on "Tracks".
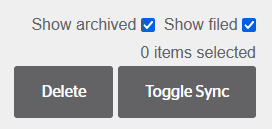
Click on "Show Archived" & "Show Filed".
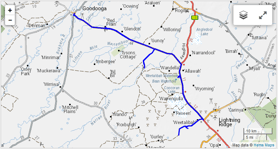
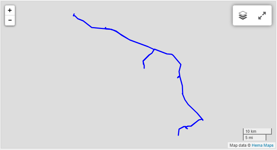
Click on the first track in the list and have a look at it.
Is this one of the tracks you want to keep / transfer?
If not, go back and select the next one.
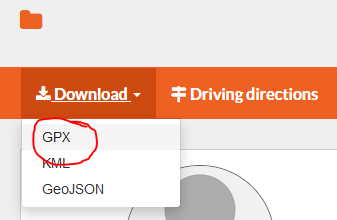
If you want to keep this one, click on Download and then GPX.
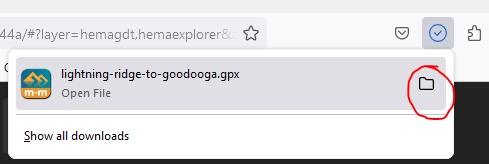
This will download the file into your PC's downloads section
Check your downloads and click on the folder.
Further down on the list you will have Desktop, click the little arrow next to that.
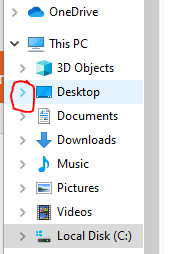
Then you can see the Folder we made before called Hema Tracks.
Click and hold the Downloaded GPX track, and move to Hema Tracks.
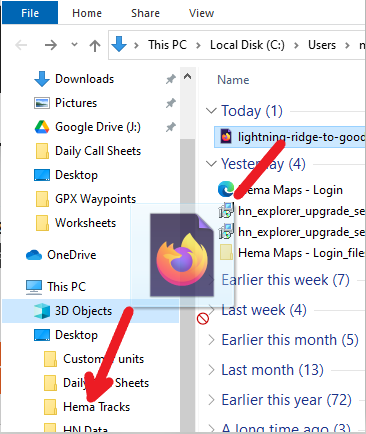
Then if you check that folder, you will see your data has been recorded there.
Now we close that and go back to our cloud – click the back button and go to the next track and start again.
Click on the track, download, GPX, folder icon, expand desktop, click and hold and move to Hema Tracks.
So just keep moving through your tracks and following that same process until you have saved all the tracks that you want to keep.
The process is the same for routes and Waypoints
Make a folder on the desktop for each one and move the data over the same as you did for the tracks.
Now, when it comes to map downloads – unfortunately they will not download and the reason for that is that they are of course copyrighted as Hema’s maps so we recommend doing is downloading to your device any sections you plan to explore before the cloud reaches end of life.
There is a video below that shows you how to do that.
Step 2: Uploading Files to the New Cloud
After you have downloaded all of your data, you can now start to upload this to the new cloud IF you have upgraded to one of the units that run on the new cloud.
For the HX2 and Hema 4 x 4 Explorer app, use the cloud.hemamaps.com cloud website.
Important to note that the new cloud does have subscription levels:
Bronze, Silver, Gold and Platinum.
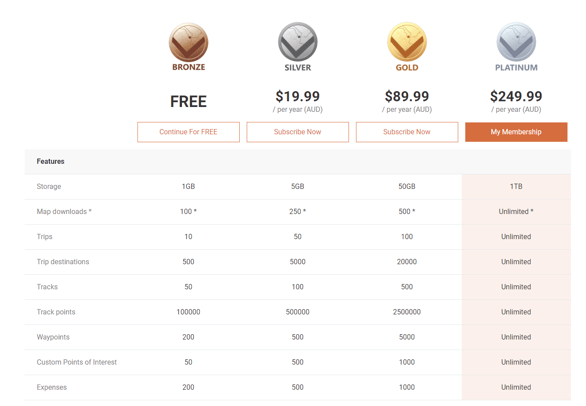
A bronze membership is free, but if you have a large amount of tracks and waypoints you may need to upgrade to the higher levels.
So lets start uploading our Data
Open a browser on your PC
For the HX2 and Hema 4x4 Explorer app, we will use cloud.hemamaps.com

Hover over my account and then click login.
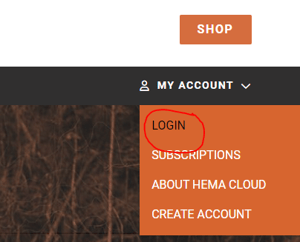
If you already have a HX2 or the 4x4 Explorer app use the same login that you used on that device.
If you do not yet have one then you will need to click on CREATE ACCOUNT.
(Fill in the details, choose a username and password.)
Once you have signed in, hover the pointer over Tracks – Click on My Tracks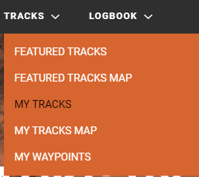
On the right hand side, select new track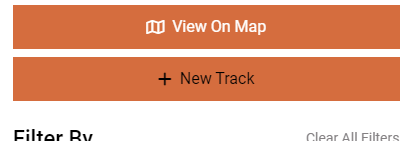
At the top, click on the words: Click here!

Open the Hema Tracks file on the desktop where you saved the tracks to.
Grab the saved GPX file and drop it into the cloud box.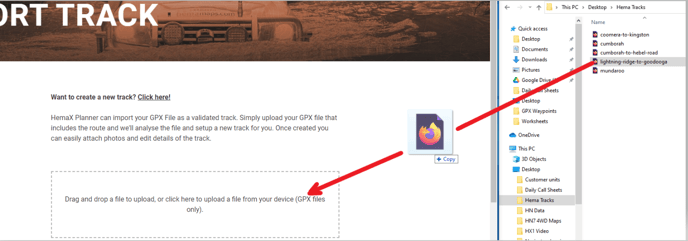
Wait for it to be uploaded to the cloud
Now we can check that the selected tracks have been uploaded.
Hover over the tracks and then open My Tracks.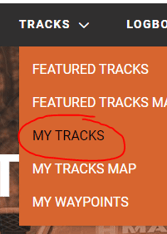
Then click on PRIVATE,
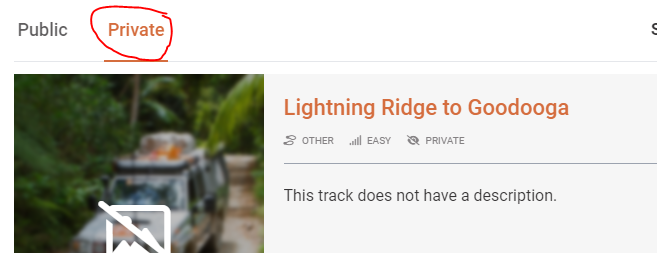
then VIEW TRACK and check that the track has been successfully moved over to the new cloud.
After you are happy that you have the Tracks you want, the last thing we need to do now is to Sync the HX2 or your 4X4 Explorer app to the cloud.
The following article will show you how to do this for the HX2:
https://kb.hemamaps.com/how-do-i-sync-to-the-hemax-cloud
Your tracks have now been transferred to the new cloud.
The process is the same for Routes and Waypoints. They are uploaded into the new cloud the same way through TRACKS, then MY TRACKS and then Click on NEW TRACK and Click Here.