Just received your HX-2+ Navigation? Here's our guide to get you out and Exploring ASAP!
For a Step by Step guide, please see below.
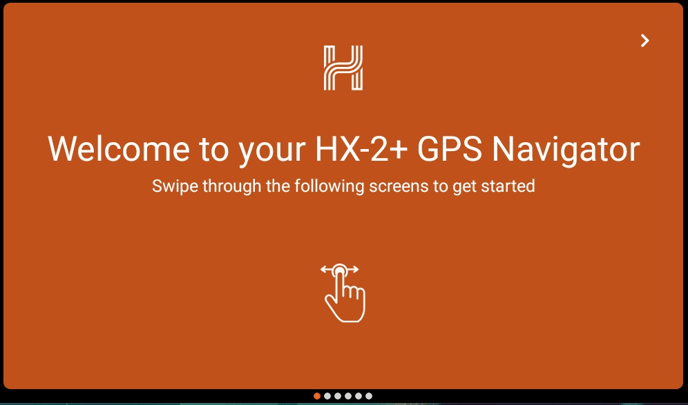
1. Turning on the HX-2+
After starting the HX-2+, you will receive informative slides introducing the device's various features. Use the arrows or swipe to navigate through these slides.
Connecting to WiFi
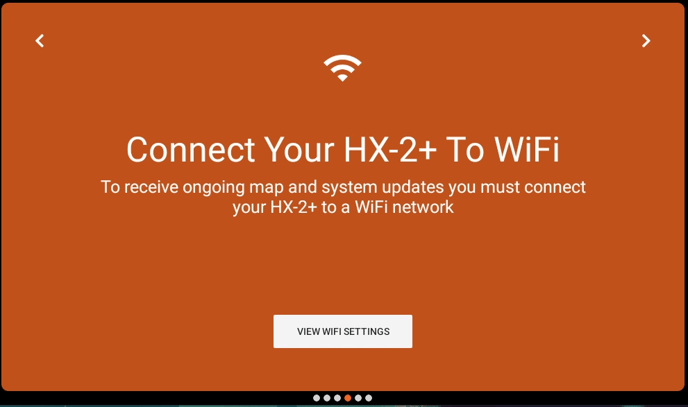
One of the informative slides provides information about WiFi.
While the HX-2+ can navigate offline, connecting the device to WiFi during initial installation is essential. This ensures your HX-2+ is set up correctly and allows you to navigate confidently. It's also recommended to regularly connect your device to WiFi to check for software, map updates and data sync.
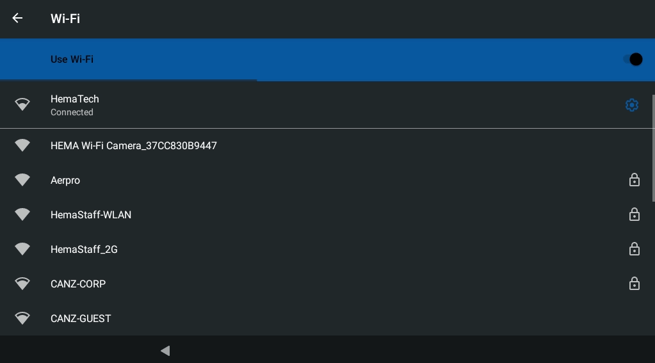
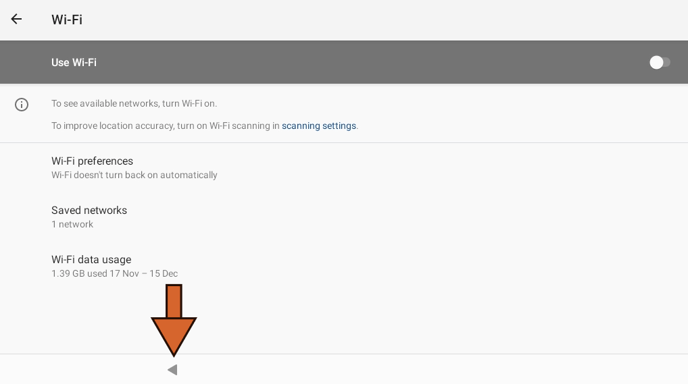
To connect to WiFi:
- Tap the "View WiFi Settings" button to open the WiFi page
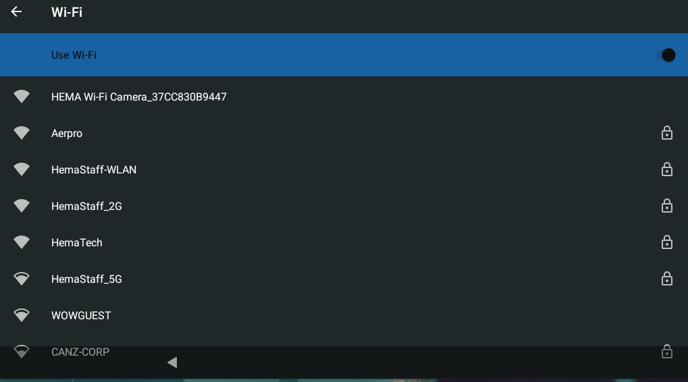
- Tap your chosen WiFi network.
- Enter your password and tap "Connect".
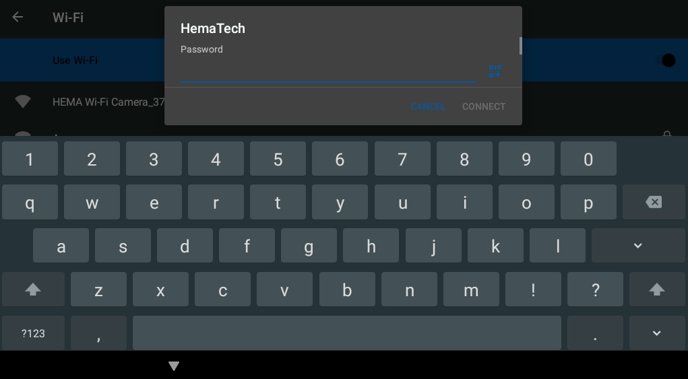
- Check if the HX-2+ has successfully connected to the WiFi. If it has, tap the back arrow in the top left corner.
2. Signing In / Creating an Account
On the following slide, you will be prompted to register your device. Registering your device is vital for several reasons:
- It enables you to enjoy three years of gold membership, giving you exclusive benefits.
- It allows our dedicated technical support team to assist whenever needed. Also, it enables us to reach out to you in case your device is ever lost or stolen.
- Registration also lets you synchronise your data with the Hema Maps Cloud, ensuring your valuable information is securely stored and easily accessible whenever needed.
You will find two sections on the registration page: "Existing members" and "New members".
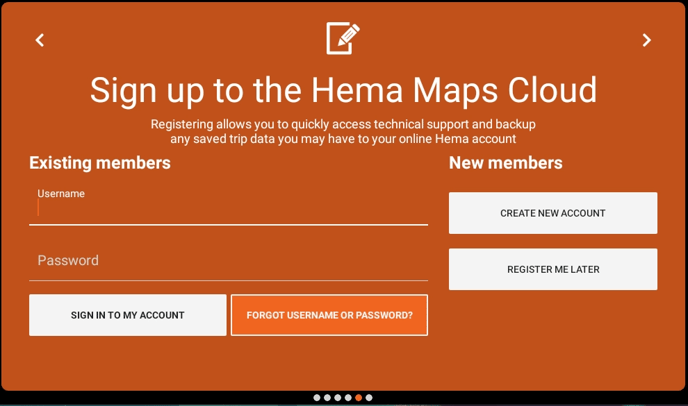
Existing Users
You can simply sign in using your existing login details if you have previously registered an account on the:
- HX-2
- 4x4 Explorer mobile application
- Hema Maps Cloud (2020)
If you have forgotten your username or password, you can easily recover it by tapping "Forgot username or password?". Just provide the email address you used when creating your account, and you will receive instructions to reset your password.
.png?width=688&height=403&name=Image%20from%20Chat%20(2).png)
New Users
You must create a new account if this is your first Hema Maps digital product or you are transitioning from the:
- HX-1
- HN Series
- Hema Explorer mobile application
- 4WD Maps mobile application
This is because we have moved our Cloud service to a new platform to support our improved maps.
Tapping "Create new account" gives you a form to fill out. We recommend you use an easy-to-remember username and password and enter an email address you can always access. Submit this form by tapping "Register".

Afterwards, you'll be taken to the HX-2+ home screen, but before you jump into the vehicle, there are two remaining steps.
3. Check for Software Updates
It is important to note that newer software versions may be available after your first boot-up. Keeping your software updated is crucial for the best and most secure experience. These updates include:
- Bug fixes
- Performance improvements
- New features
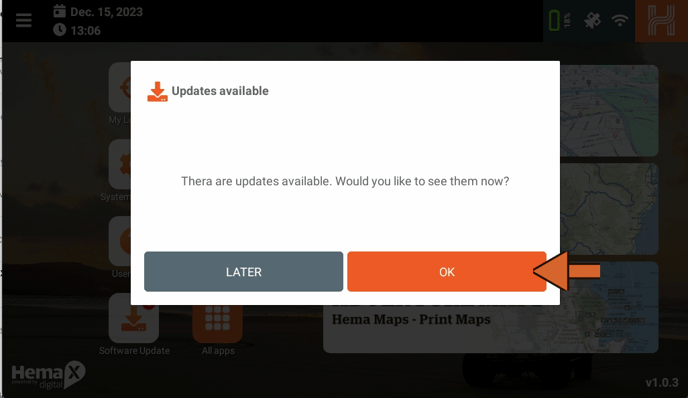
The application will always notify you of any new updates with a popup. You can tap the "OK" button to be directed to the update page.
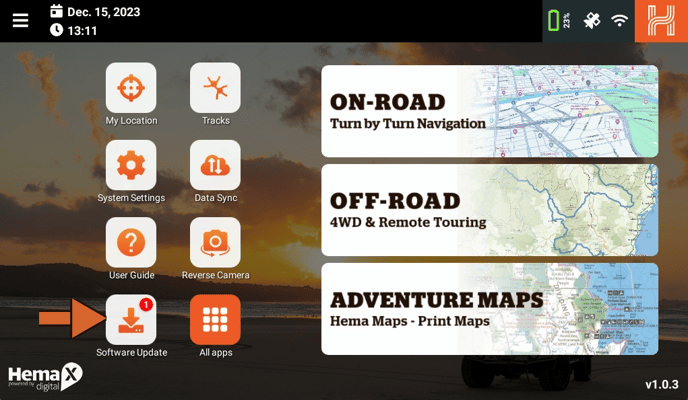
Alternatively, you can look for the software update button on the homepage or in the app drawer.
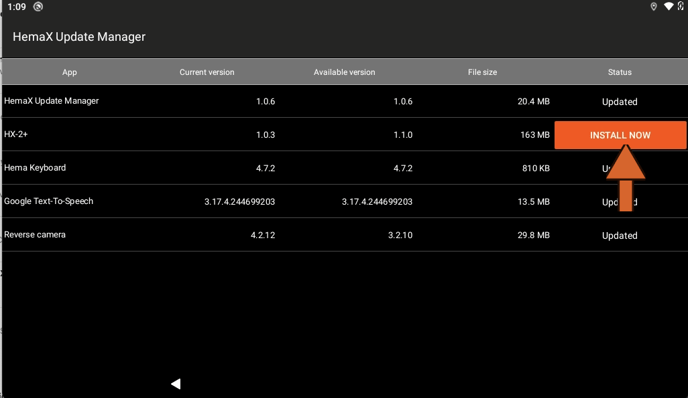
Software updates are generally listed under "HX-2+" on the Update Manager Page. This section will show you your current and latest software versions and the data required to complete the update.

Tap "Install Now" to start the update. Ensure you have enough data to complete the process successfully.
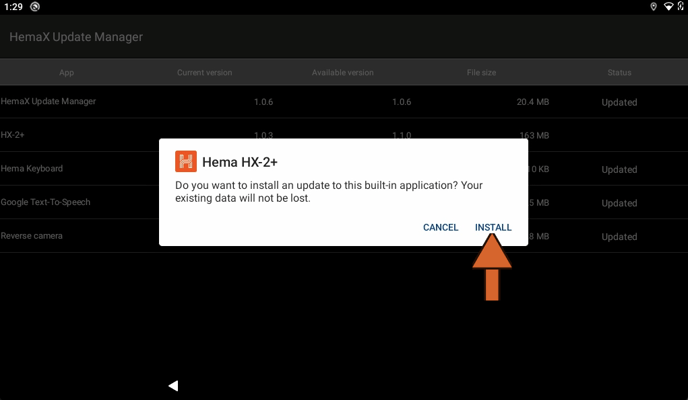
After the update has been fully downloaded, a popup will appear. Tap the "Install" button to continue with the update process.
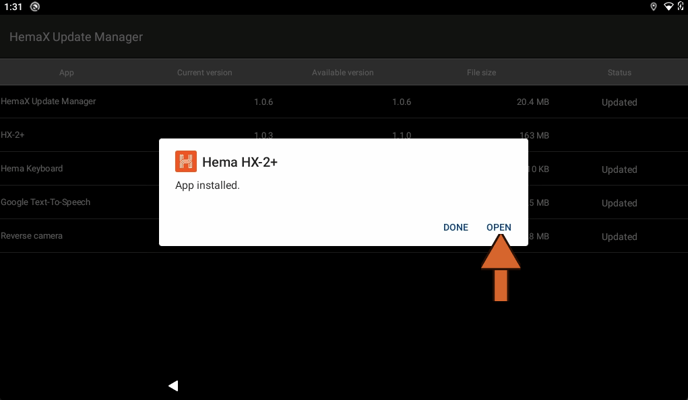
After waiting a bit more, another popup will appear, confirming that the HX-2+'s software has been updated. Tapping the "Open" button will reboot the device.
4. Performing your First Data Sync
Data synchronisation, or data-syncing, is a crucial feature of your HX-2+. It allows you to:
- Save and secure your tracks, trips, waypoints, and points of interest on the Hema Maps Cloud. Access various tools to edit and customise your saved data.
- Explore other users' shared trips and tracks and Hema Map's featured destinations to enhance your next adventure.
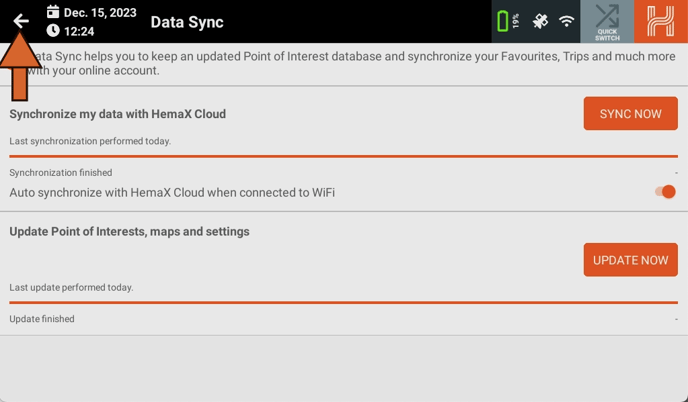
To access the Data-Sync Menu, tap the "Data Sync" button from the home screen, shown by the Cloud with two parallel arrows.
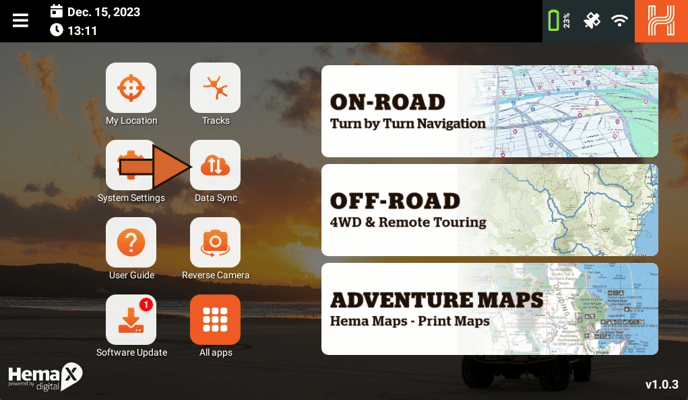
Once on the menu, you'll see two sections: "Synchronise my data with Hema Maps Cloud" and "Update Points of Interests, Maps and Settings".
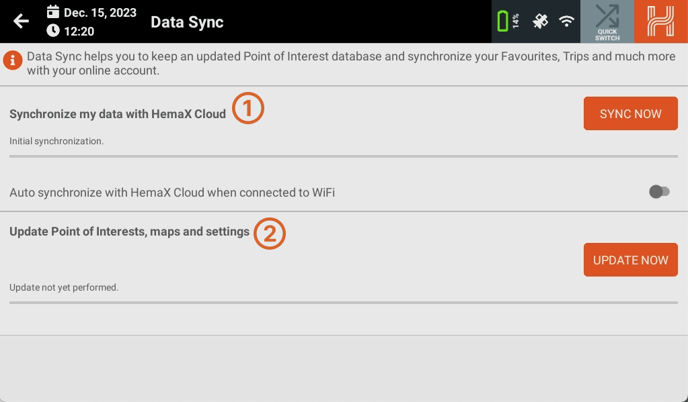
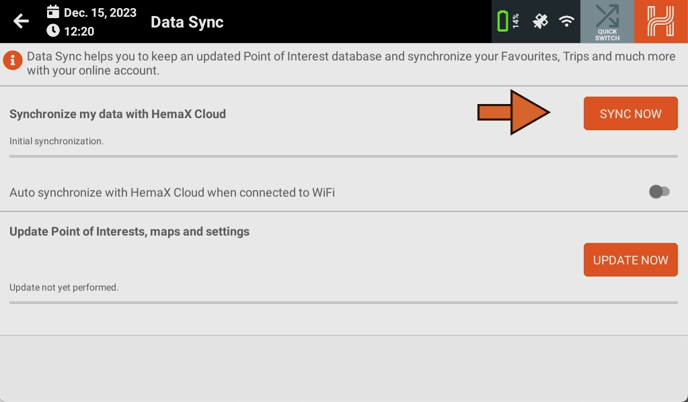
Let's start with "Synchronise my data with HemaX Cloud". This step will upload all the data stored on the HX-2+ to your account, and download anything created or edited on Cloud to the device.
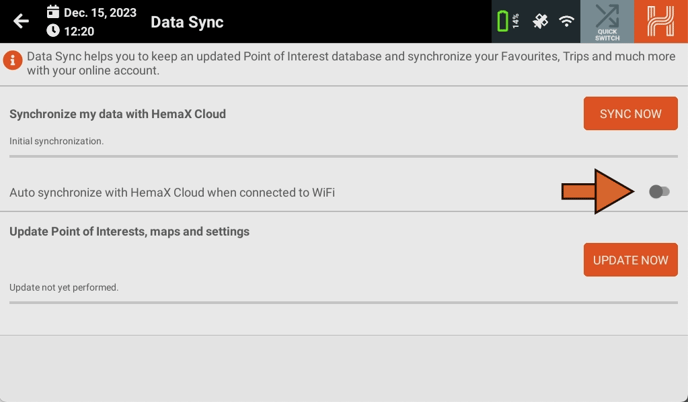
If you want the HX-2+ to automatically perform a data-sync whenever it detects a saved WiFi connection, turn on "Auto synchronize with HemaX Cloud when connected to WiFi".
We recommend doing this if you have enough WiFi data, as it helps take the burden off manually synchronising, lowering the risk of losing your saved items.
Updating the HX-2+'s Database
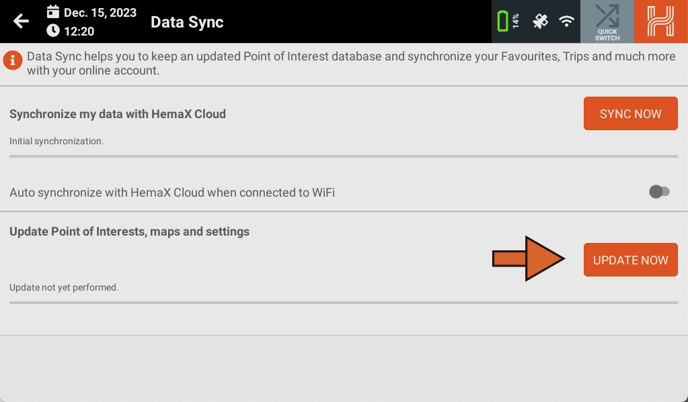
The second section, "Update Points of Interests, Maps and Settings", updates your device with the latest Points and interests, available add-ons, and settings. Begin by tapping "Update Now".
As with the first section, you can follow the progress of the sync with the:
- Progress bar
- Percentage counter
- Step number / descriptions.
Once your syncs have completed, return to the homepage.
5. Updating your Maps
It is important to note that your device comes with preloaded maps. Still, newer maps may be available during your setup.
To ensure you are navigating with the most up-to-date maps, you will receive popups whenever a new map is released. This will keep you informed and allow you to easily install the latest maps for your device.
To install new maps on your device, follow these steps:
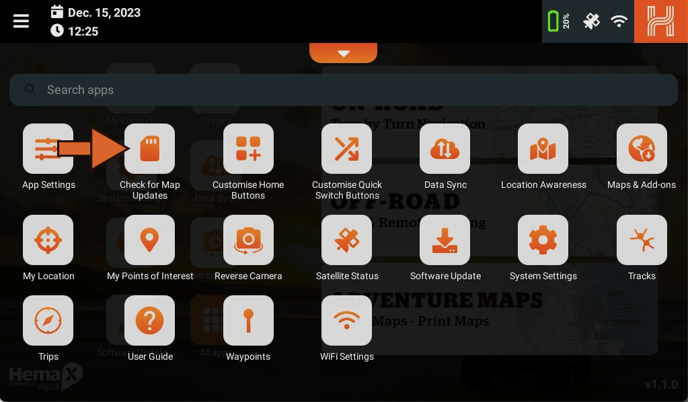
- From the home screen, open "All Apps".
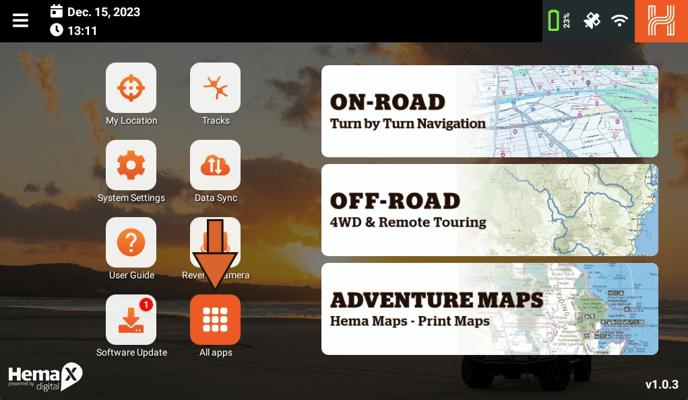
- Find and open "Check for Map Updates" in the application drawer's top left corner.
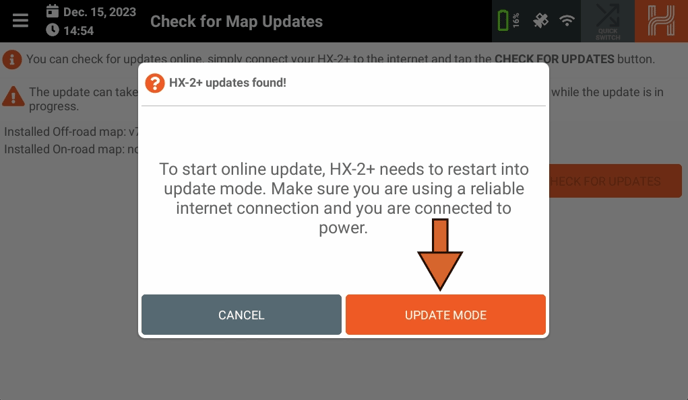
If there are any map updates available, a popup will appear. Tap "Update Mode" to start the installation process.
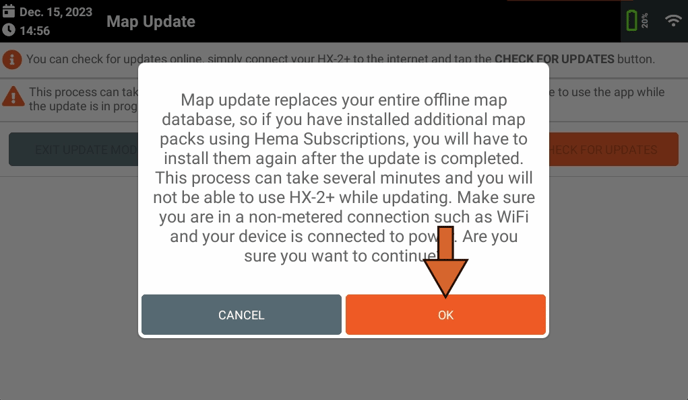
The HX-2+ will reboot into a new page, called "Map Update", with a popup appearing explaining that you will have to reinstall additional map packs is you have previously done so. Tap "OK".
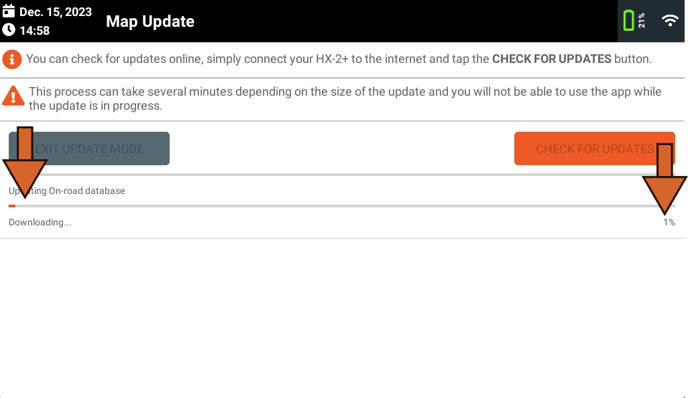
Your map updates will now begin. Map updates are divided into two sections: On-road and Offroad, with Offroad being first, followed by On-road.
As with the first section, you can follow the progress of the sync with the:
- Progress bar
- Percentage counter
- Step number / descriptions.
Always double check you have enough data available to complete the update, and ensure you a have a strong, stable connection.
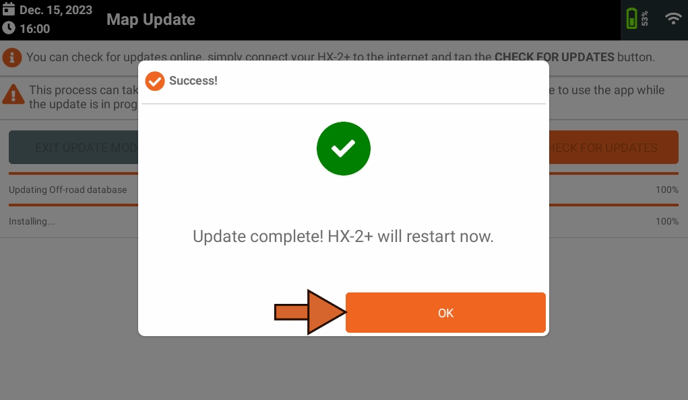
Once the downloads have completed, a popup will appear asking you to reboot. Tap "OK."
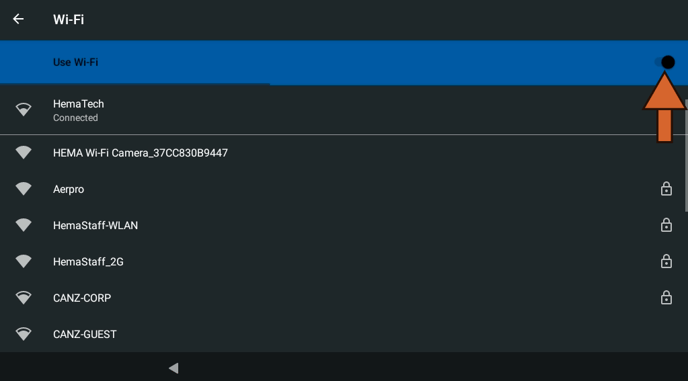
To ensure your maps have downloaded correctly, it is helpful to disconnect your device from Wi-Fi and check if the maps are loading properly. This allows you to verify that the maps have been successfully downloaded and are ready to use.
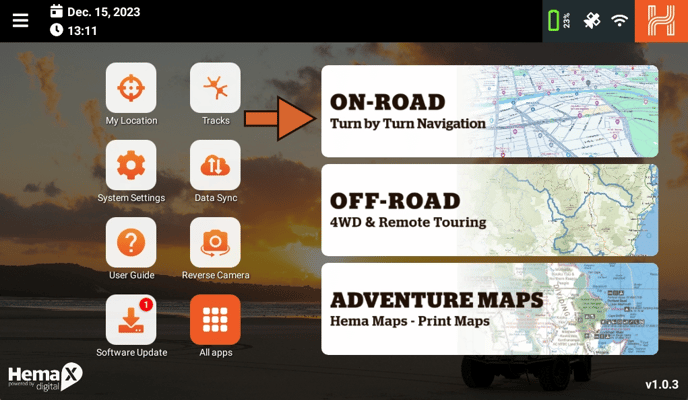
If your maps have been installed correctly, you will be able to view the entire map of Australia in full detail and create routes to any chosen destination.
.png?width=688&height=403&name=Image%20from%20Chat%20(1).png)
Final Words
We appreciate you taking the time to read our guide on setting up your HX-2+!
To expand your understanding of the HX-2+, we recommend exploring our Knowledge Base and user guide. These resources offer detailed information and helpful tips on getting the most of your device.
We're here to assist you with software or account-related issues. Please submit a ticket to our Knowledge Base, and our dedicated support team will promptly address your concerns.
Thank you for choosing to navigate with Hema Maps, and we hope you have a fantastic experience with your HX-2+!