You can import a GPX file to the HX-2 two ways.
Import GPX file on the HX-2
The first way is on the unit itself. To do this you will need to copy the GPX file/s to an SD Card and then insert the SD Card into the HX-2.
Step 1:
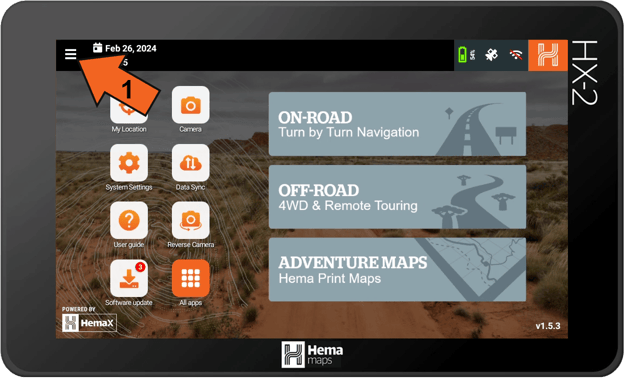
Click on the Main menu [1] in the top left hand corner.
Step 2:
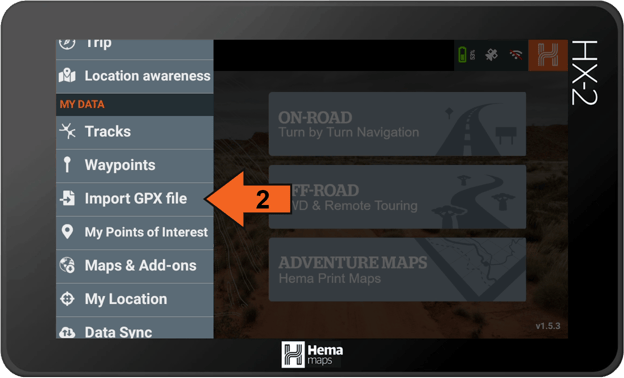
When the main menu opens scroll down and click on Import GPX file [2].
Step 3:
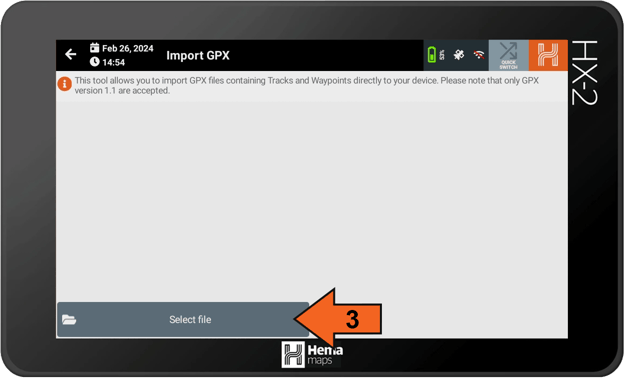
When the Import GPX page loads click on Select file [3].
Step 4:
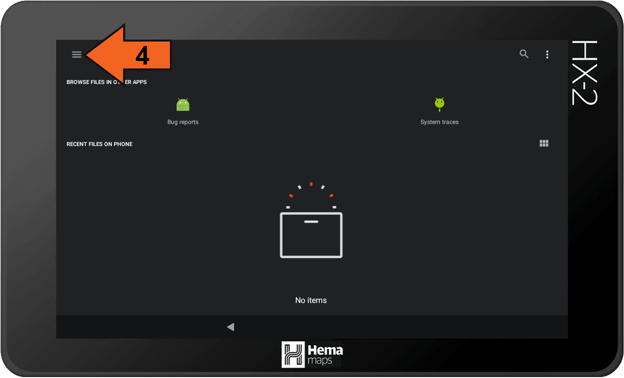
When the Select file page loads click on Menu [4].
Step 5:

When the Menu opens select your SD Card for the list of storage devices [5].
Step 6:
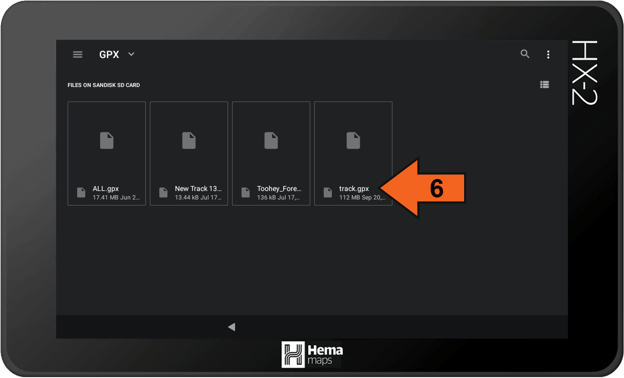
You will now see the files on your SD Card and you can pick the file you wish to import by clicking on it [6].
Step 7:
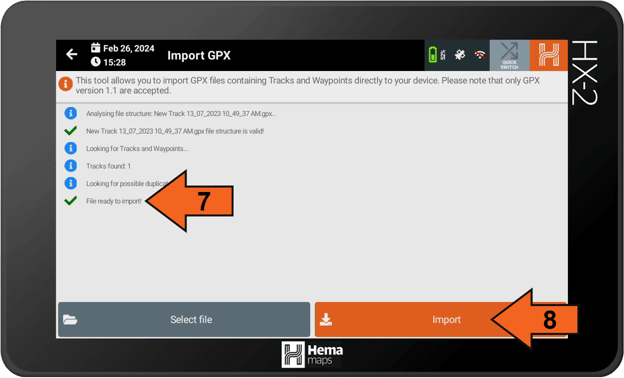
You will now be taken back to the Import GPX page, and when you see the notification that File ready to import! [7], click on the Import [8] button in the bottom right.
Step 8:
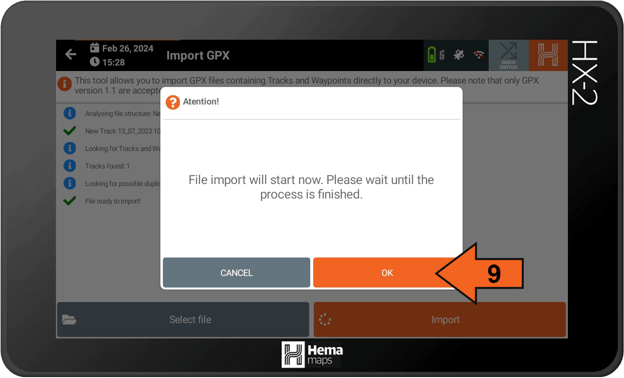
Click OK [9] to proceed with the import.
Step 9:
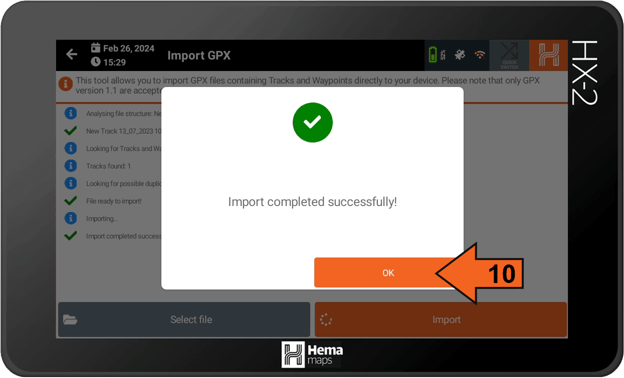
Click OK [10] to proceed with the import.
Step 10:
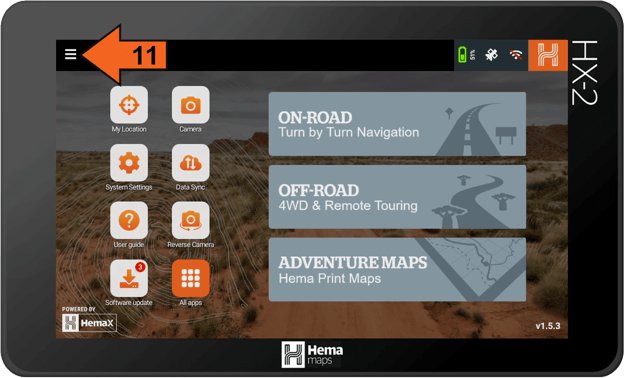
To view your imported track on your HX-2 click on the Main menu [11].
Step 11:
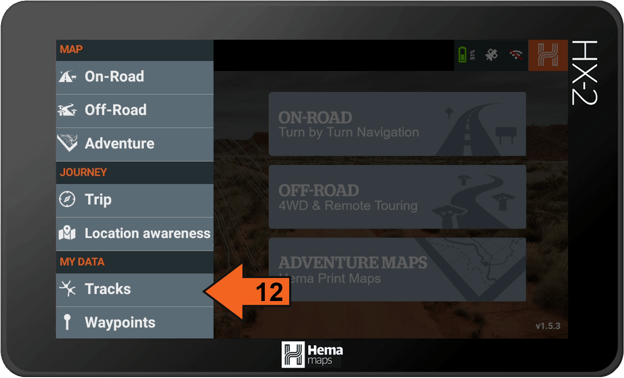
From the main menu click on the Tracks [12].
Step 12:
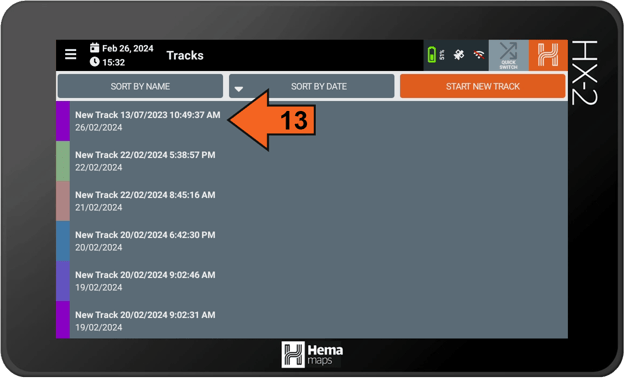
When the Tracks page loads click on track you would like to view [13].
Step 13:
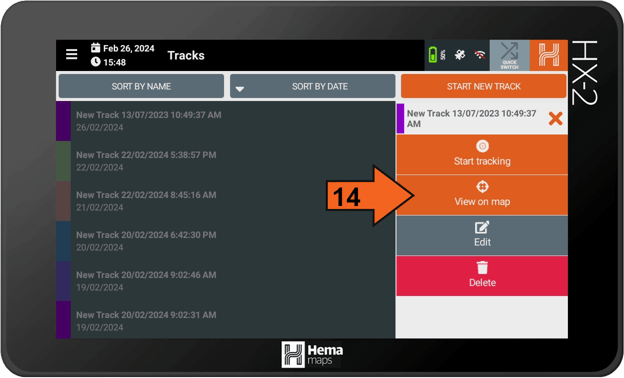
To view your track on the map click on View on map [14]. You can also continue the track, Edit the track details and also Delete the track from here.
Import GPX file on the HemaX cloud
The second way is on the HemaX cloud. You can access the Import GPX file page using the link below.
https://cloud.hemamaps.com/Tracks/ImportTrack
Step 1:

When the page loads, please enter your HemaX cloud username and password [1] and then click Login [2].
Step 2:

The import GPX Track page will now load and you can choose the file you wish to import by clicking the Browse button [1]. Once your selected file is displayed click on Start Import [2].
Step 3:

You will then get a notification that your track is being processed. [5].
Step 4:

To view your imported GPX file on the Hema Cloud website click on Tracks [6] in the top menu.
Step 5:

Your imported track should be in the list of tracks and if you click on View track [7] you track will be shown on the map.
Step 6:

You will now see your track on the map and you have a selection of options on the left hand side.
If the steps above do not resolve this issue, please contact our technical support team for further assistance.
You can submit at technical support ticket via our website at https://kb.hemamaps.com/kb-tickets/new