.png?width=128&height=72&name=Hema%20Maps%20Logo%20(1).png)
Once you have transferred track data to your PC, and you wish to
- Load
- View
- Edit
the data, click the Load button on the toolbar, then click the Load Track from File (Multi) submenu item
-png.png)
Browse to where you saved the data on your PC, then either double-click the the desired track, or click once to select, and then click the Open button.
-png.png)
By default the Hema Navigator Explorer will transfer data from the Navigator's OziExplorer Data folder on the SD card, to the C:\users\<YourUserName>\.Hema Navigator\Data folder on your PC.
The selected track will load (it should only take a second, as the data size, even for a lengthy track, is quite small).
After it has loaded, click the Show / Hide Track Control button on the toolbar, shown here highlighted in the red box:
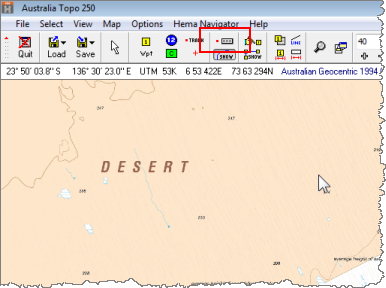
The Track Control window will open.
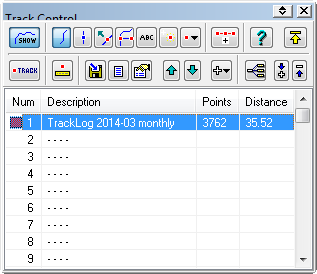

Click on the desired track to highlight it (if you have more than one track loaded), then click the Show Track List button, shown above.
The Track List window will open. The Track List window shows all of the points contained within the currently selected track.
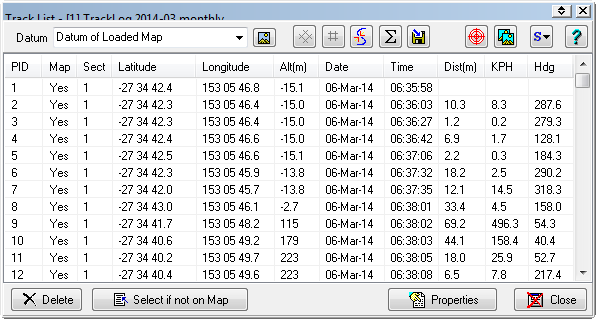

To locate the track on the map, click any point within the Track List window (the first point in the track is as good as any), then click the Plot Location button, as shown above.
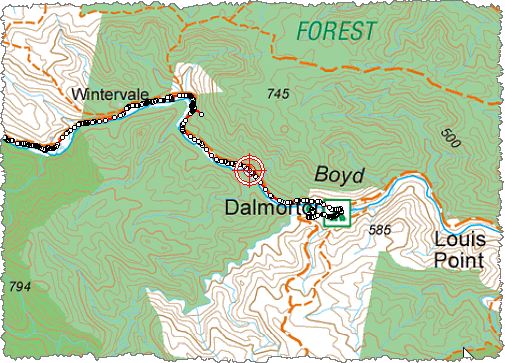
The map will jump to the selected track point's position, and the point will be highlighted with a "gunsight" cursor as shown here.
You may have to either move the windows around, or temporarily hide them using the Window Roll Up button ( ) to see the point plotted on the map.
The gunsight cursor is only displayed while the Track List window is open.
You can click on any point in the Track List window, and the gunsight will highlight that point.