.png?width=128&height=72&name=Hema%20Maps%20Logo%20(1).png)
To perform this installation, your HN7 MUST be connected to the PC in Mass Storage mode, as detailed in the article linked below:
HN7 Navigator - USB Mass Storage Mode connection to PC
The installer will not work correctly if the HN7 is NOT in Mass Storage mode!
This article describes how to install the Hema Navigator Explorer companion program on to a Windows PC.
The installer (Setup program) runs directly off the HN7's SD card, as the HN7 is not supplied with a copy on DVD.
You have two options for running the installer:
- Connect the HN7 directly to the Windows PC (in USB Mode) and run the installer off the HN7 SD card drive letter
- Remove the SD card from the HN7 and put it into an SD card reader attached to your PC
Whichever method you choose, the process is the same.
Continue with the instructions below.
Install with HN7 connected to PC
Once the HN7 is connected to the PC in USB mode, it should be visible within the Windows Explorer tree. The HN7 appears with TWO drive letters (one for internal memory, and one for the SD card) as shown below:
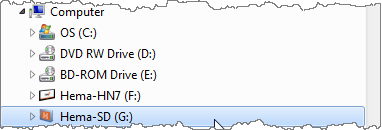
Click on the drive letter which represents the HN7 SD card.
Continue with the instructions from Run the Installation program below
Install with SD card in card reader connected to PC
With the SD card in the card reader, click on the drive letter which represents the SD card in Windows Explorer.
Continue with the instructions from Run the Installation program below
Run the Installation program
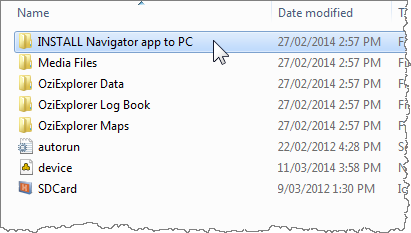
The right hand panel of Windows Explorer will show you the content on the HN7 SD card. Double-click the INSTALL Navigator app to PC folder:
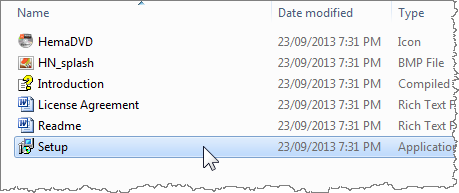
Within the folder, double-click the Setup program to start the software installation
You may receive a prompt from Windows User Account Control asking:
"Do you want to allow the following program from an unknown publisher to make changes to this computer?"
Click the Yes button to continue
The installer will start running, and display a sequence of screens. You can accept the defaults for all of the settings within the Setup program. Simply tap the Next button to progress through the screens.
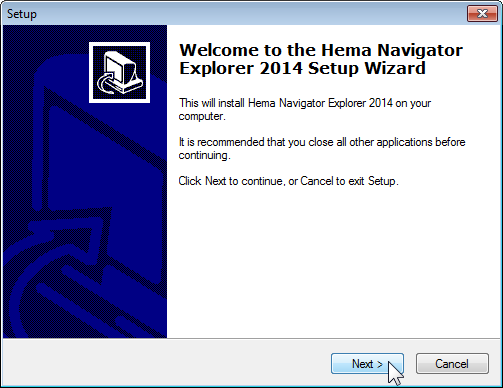
Click the Next button to continue...
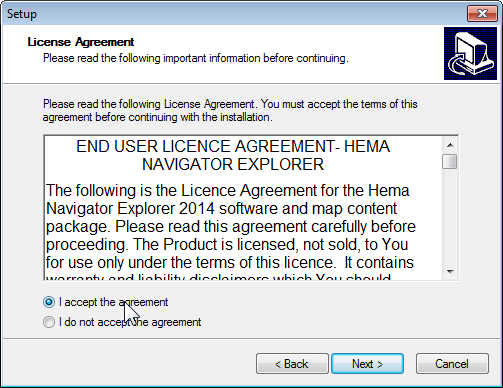
You must click the I accept the agreement button, then click the Next button to continue...
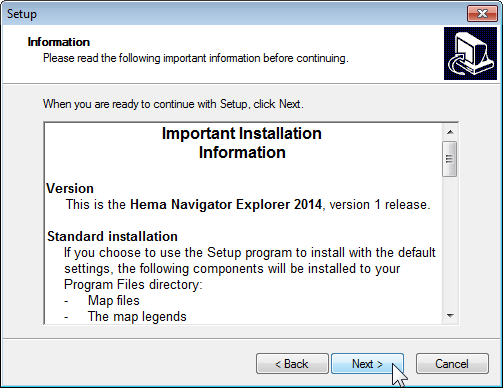
Click the Next button to continue...
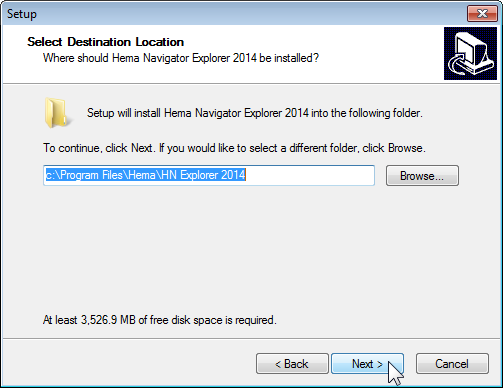
Leave the default installation path as it is, then click the Next button to continue...
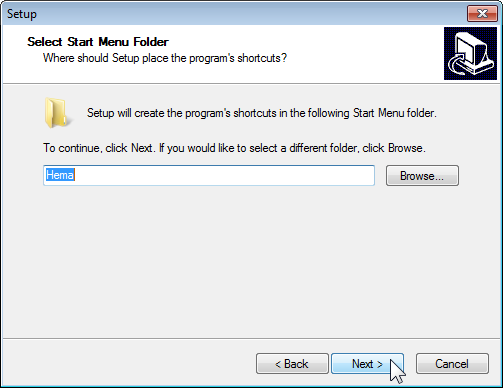
Leave the default options, then click the Next button to continue...
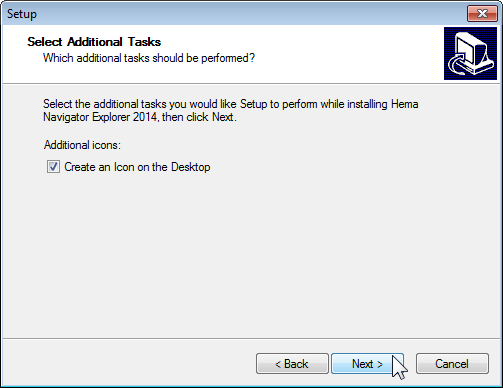
Leave the default options, then click the Next button to continue...
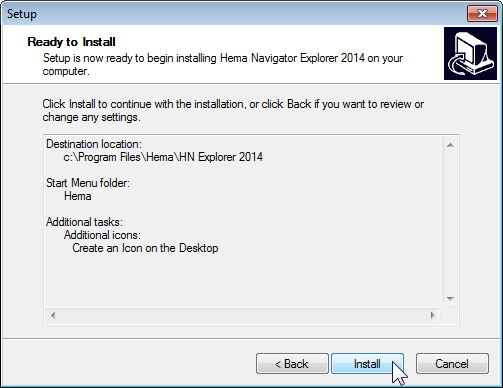
Click the Install button to continue with the installation...

The Setup program will display a progress bar during the process of copying the required content to your Windows PC
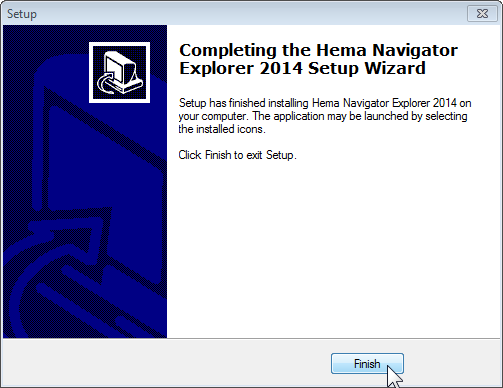
Once the Setup program is complete, it will display a summary window. Click the Finish button to exit the Setup program.
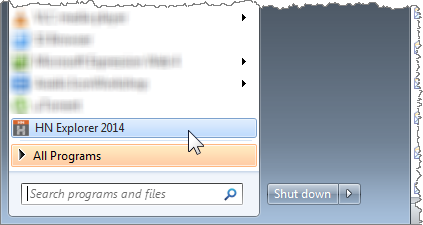
Start Menu on Windows Vista and Windows 7
After installation, an icon will be created on the Start Menu (Windows 7 shown here). The Start Menu will contain a folder under the "All Programs" menu containing the HN Explorer icon.
Start Screen on Windows 8
After installation, an icon will be created on the Windows Desktop. Windows 8 does not create Start Screen tiles by default, but an icon is also created under the Windows 8 "All Apps" screen. You can right-click this icon, and click "Pin to Start Screen" to create an icon on the Windows 8 Start Screen.
Once the Hema Navigator Explorer software is installed, to transfer data back and forth between the PC and Navigator, you need to connect the HN7 in Sync Mode.
Here's a video tutorial on how to install Hema Navigator Explorer onto your PC.