.png?width=128&height=72&name=Hema%20Maps%20Logo%20(1).png)
Entering coordinates in iGo (Street Mode)
Normally, you would enter an address to navigator to while in street mode on the Navigator. There may be times when you want to add a coordinate instead.
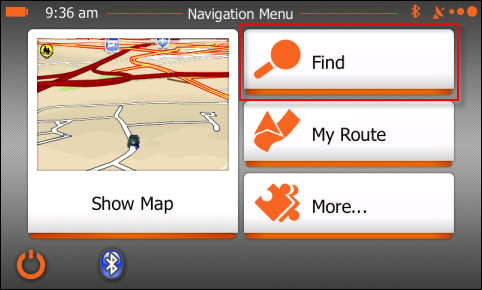
To enter a coordinate, simply tap the Find button from the main Navigation menu, as you normally would to search for an address.
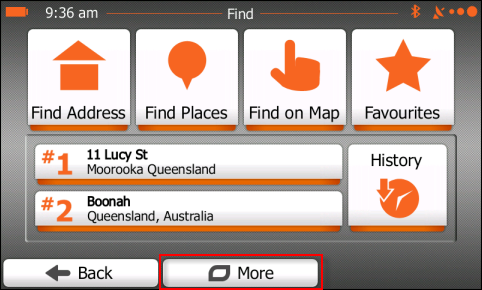
Once on the Find menu, tap the More button
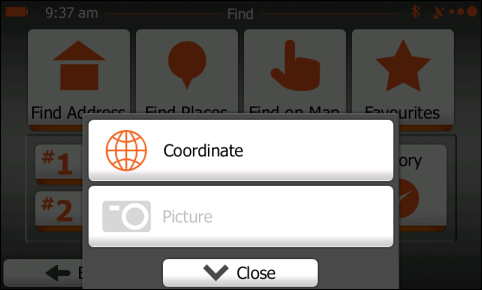
Tap the Coordinate button on the More menu.
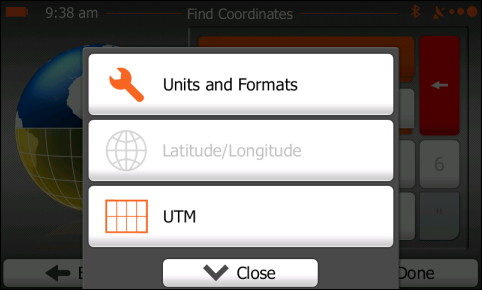
The Find Coordinates screen will appear, allowing you to to enter the desired coordinate.
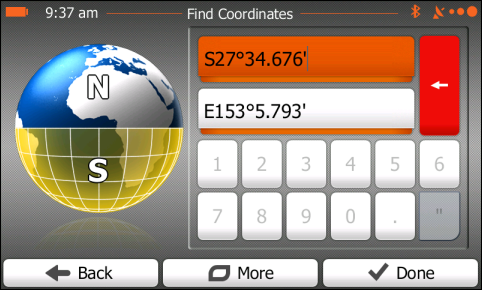
If you tap the More button on the Find Coordinates screen, you can go to the Units and Formats settings screen to change the format of the coordinate you wish to enter.
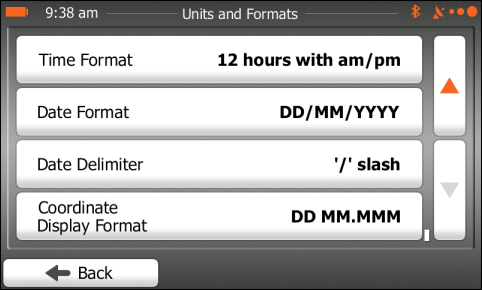
In the Units and Formats settings, tap the Coordinate Display Format field to choose whichever format suits your purpose.
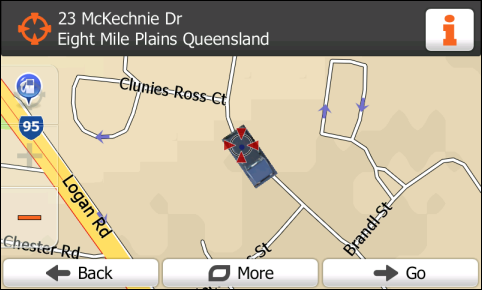
Once you have entered your coordinate, you will see a preview of the position on screen. Tap the Go button to create a route to that position.
Remember you are using street mode. If you enter a coordinate which is NOT on a road, then the software will likely take you to a position as close as it can to your desired position, while staying on the road.
After that, everything proceeds as per a "normal" search and navigate operation.
Remember that if you have entered a position which is NOT located on a navigable road, the software may not be able to create a route all the way to that position.
Entering coordinates in OziExplorer (4WD Mode)
OziExplorer allows you to create a waypoint at any location. Normally, the default location is where you are.
To be able to add a waypoint for a location which you have the coordinates for, you first need to create a waypoint. It does not matter where the waypoint is located, as you will be changing the position immediately anyway.
Tap the Create Waypoint button.
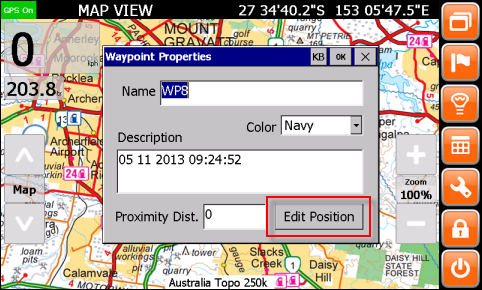
The Waypoint Properties window will popup on screen. You can change the name of the waypoint if you so desire (it is better to give your waypoint a name). Then tap the Edit Position button to make changes to the waypoint's position.
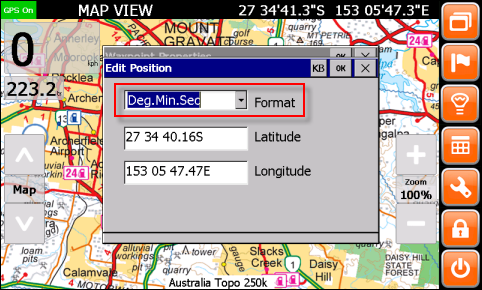
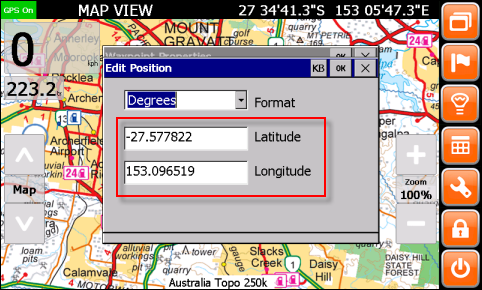
You can tap on the Format dropdown to change the format to match the format of the coordinate you wish to enter.
Once you have chosen the desired format, enter the coordinate details that you have, tap the OK button the Edit Position window, then tap the OK button on the Waypoint Properties window to save the waypoint to your Waypoint List.
Once the waypoint is in your Waypoint list, you can navigate to it in the usual way (ie. "as the crow flies")