Your HX-2 contains a powerful trip planning engine. The steps below will guide you through creating a new trip.
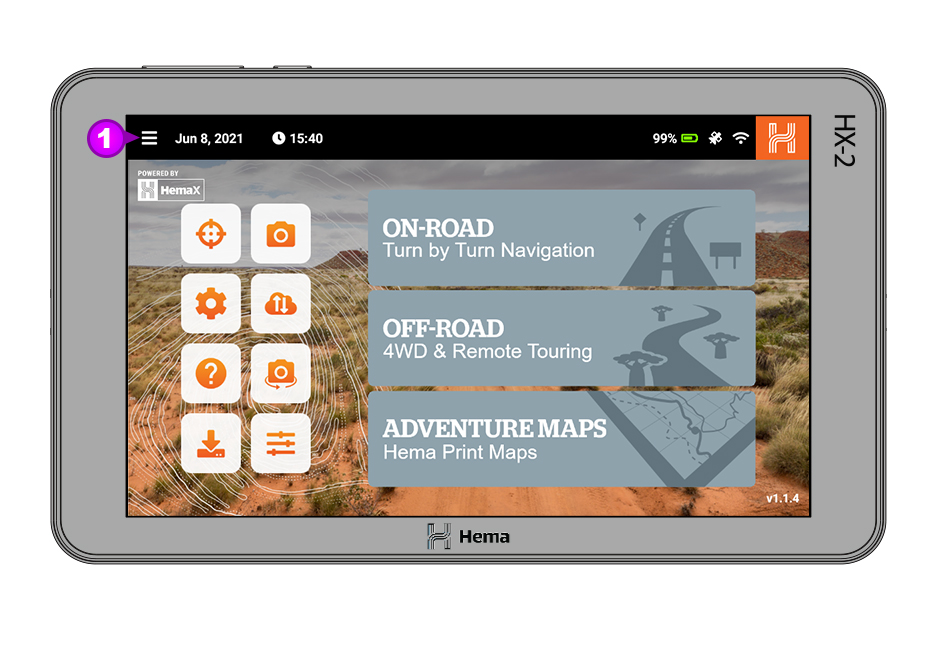
Step 1
You can access the Trip planning mode by going into the Main Menu [1]
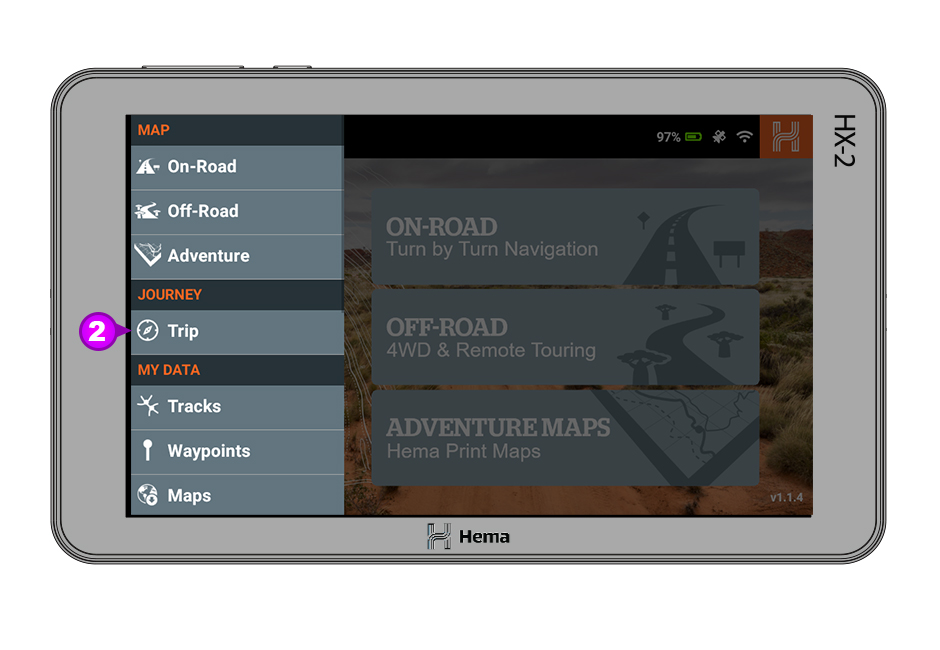
Step 2
From the main menu click on Trips [2].
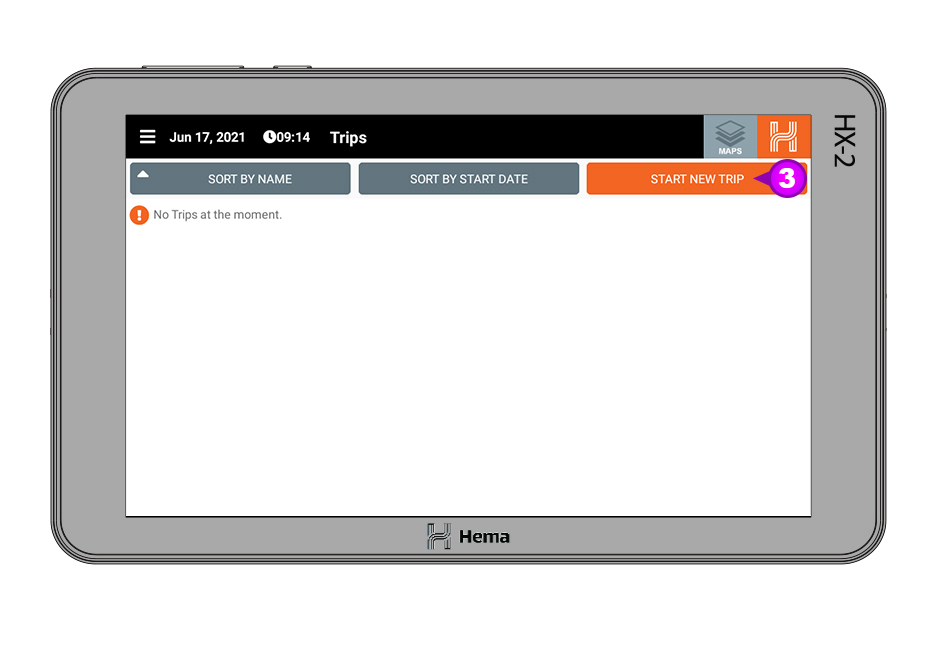
Step 3
When the Trips page opens for the first time there will be no active trips. To create a new trip, click on Start New Trip [3].
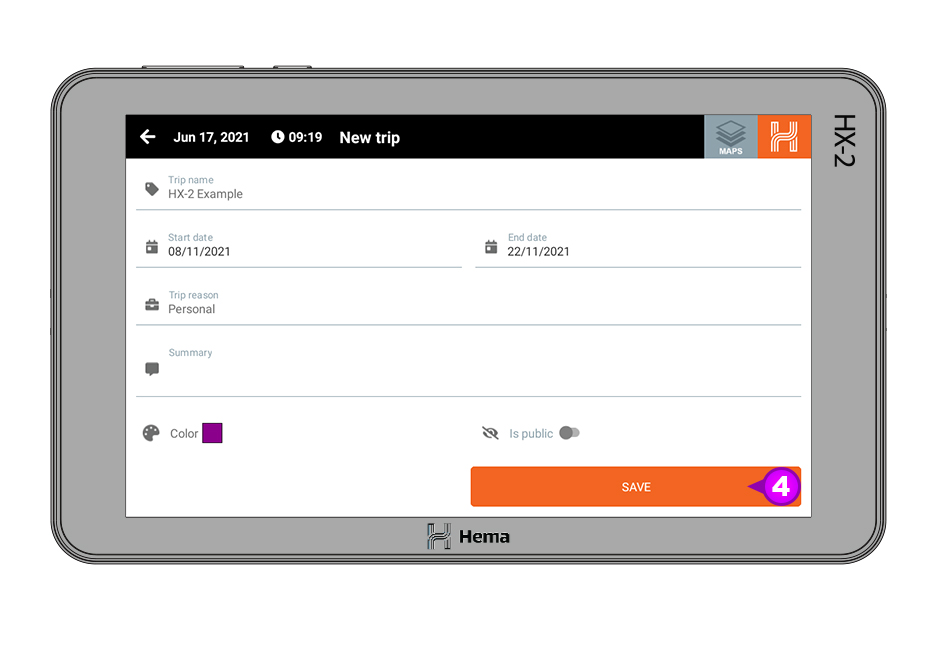
Step 4
When you click on Start New Trip, the new trip page will load. You will need to give your new trip a name, select a start and finish date and also select a reason for the trip. Once you have completed this please click Save [4].
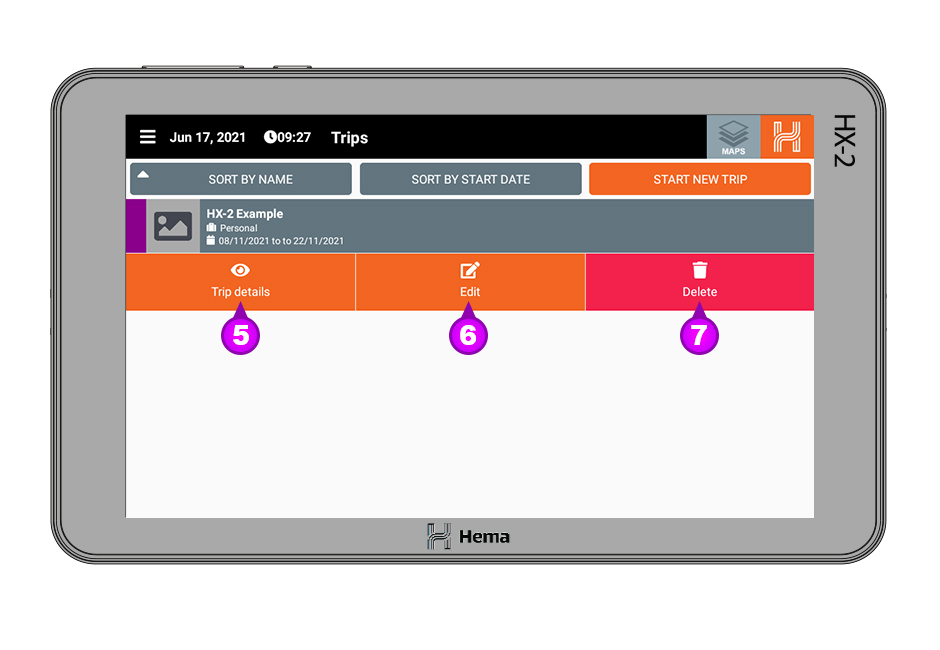
Step 5
When you have saved your trip it will be displayed in the trip list. If you click on your trip in the trip list you will see three options drop down. They are;
5 Trip details - shows the trip details
6 Edit - edits the trip information
7 Delete - deletes the trip
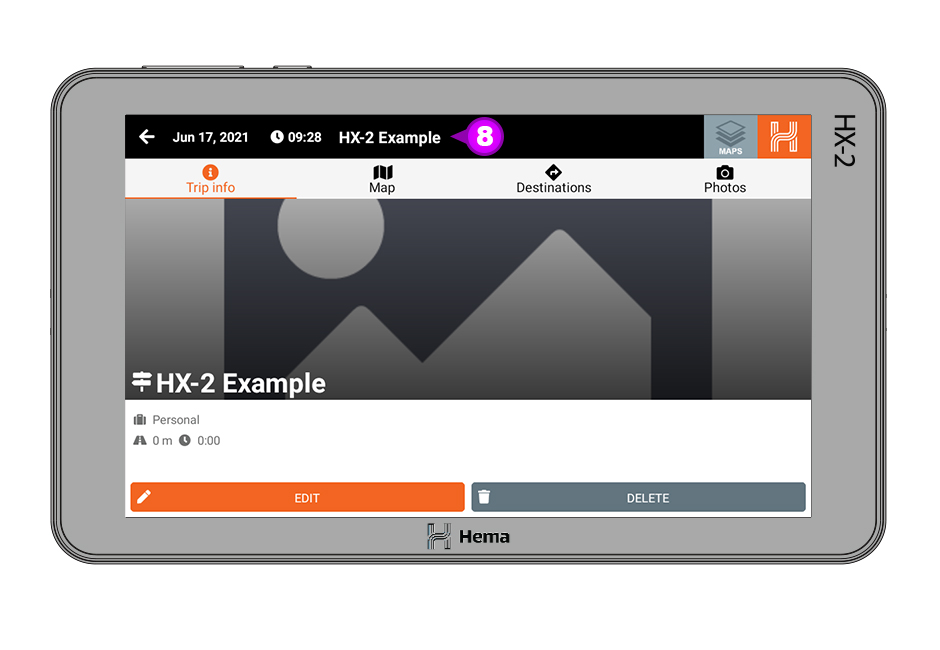
Step 6
To start planning your trip click on Trip Details and then the trip information page will load.
At the top of the trip information page you will see the Trip Name [8].
Step 7
To start adding destinations to your trip, click on the Map [9] heading at the top of the page.
You will see your current position marked as the blue circle [10] on the map. We will use this as the first destination in our trip.
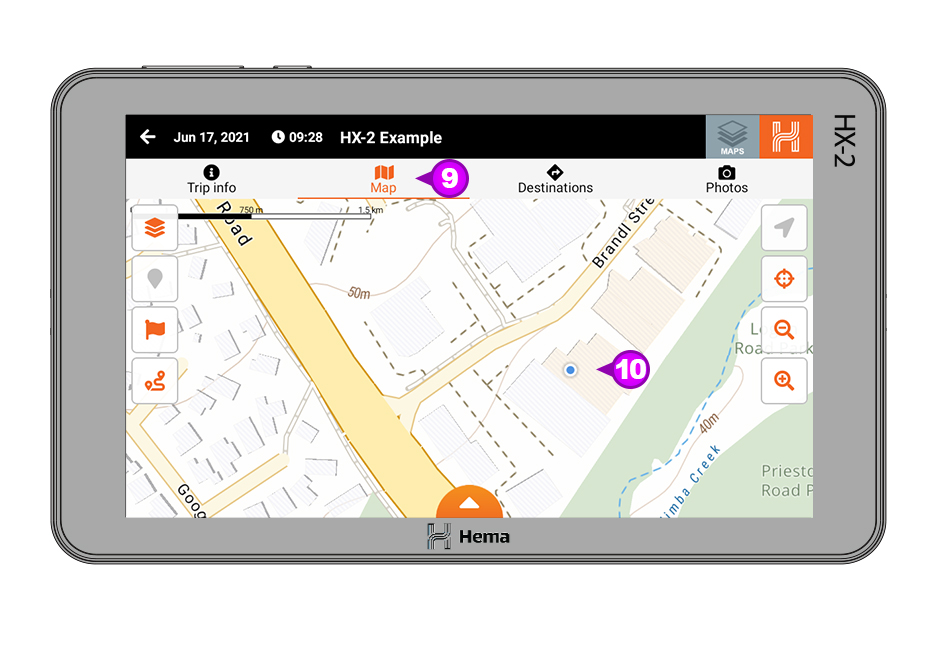
Step 9
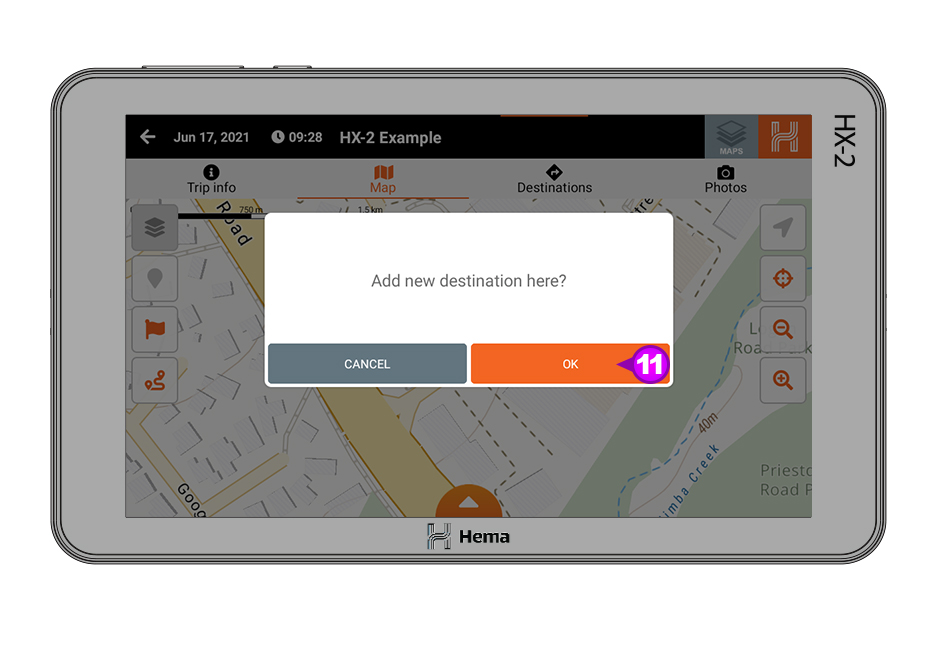
To add this as the first destination simply click and hold down on the screen for 2 seconds about your current location.
You will then get a dialog box asking if you want to Add New destination here? To add this destination click OK [11].
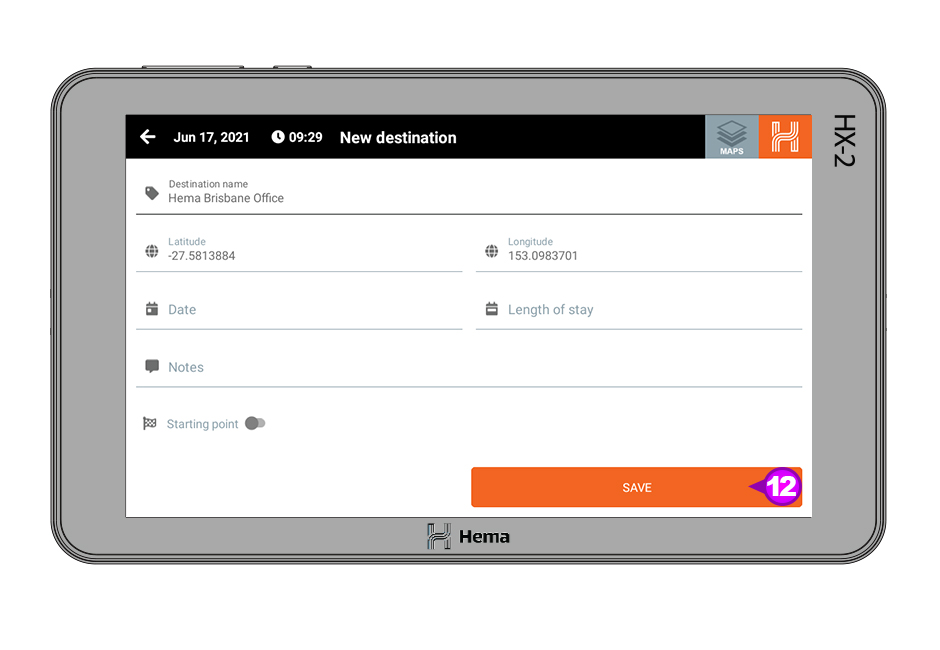
Step 10
When you click OK you will be asked to add some details about the destination. You can edit the name of the destination, check its coordinates and add other information about the destination. When you are happy with the information, please click Save [12] to confirm and add your destination.
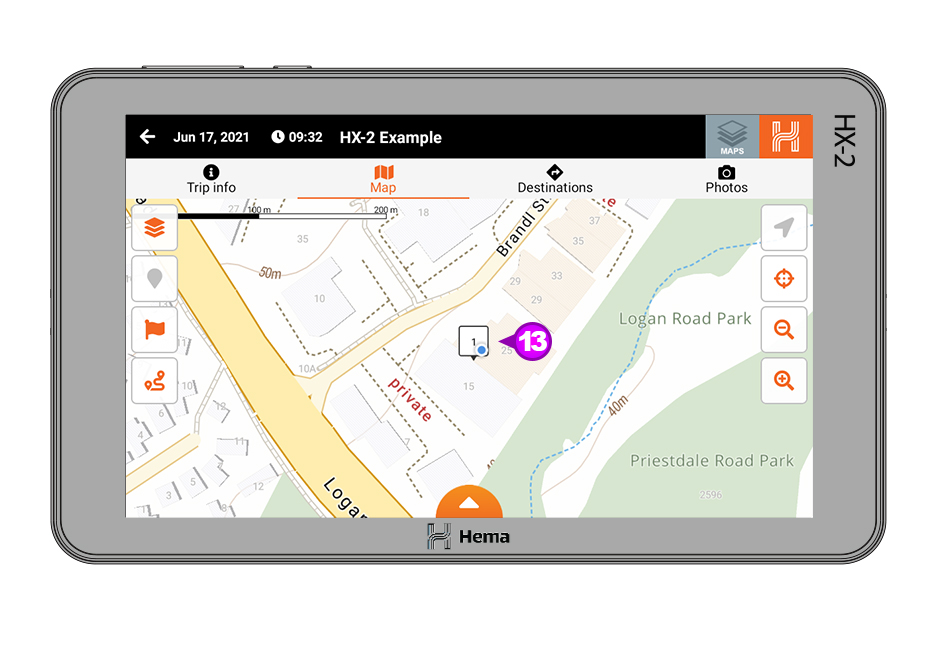
Step 11
After you click save, you will be taken back to the Map and you will see a 1 icon [13] to indicate the destination has been added.
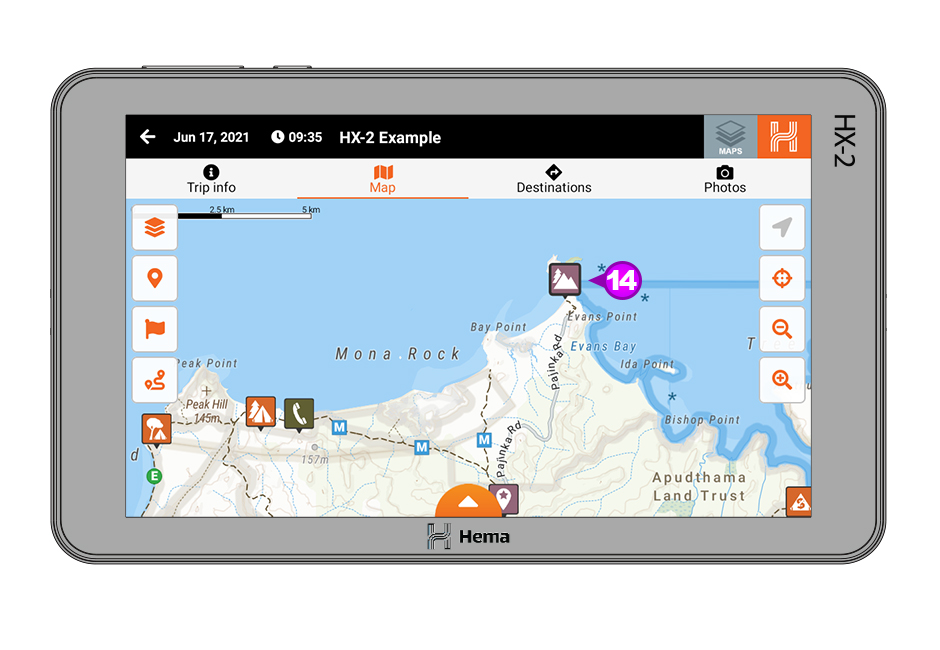
Step 12
Now it is time to add another destination to your trip. You can either add another custom destination or you can select an existing POI. For this example we will use an existing POI, the northernmost tip of Cape York [14].
When you click on the POI icon you will be given more detailed information about the POI and then three drop down options.
15 Add Destination
16 Navigate To
17 View More
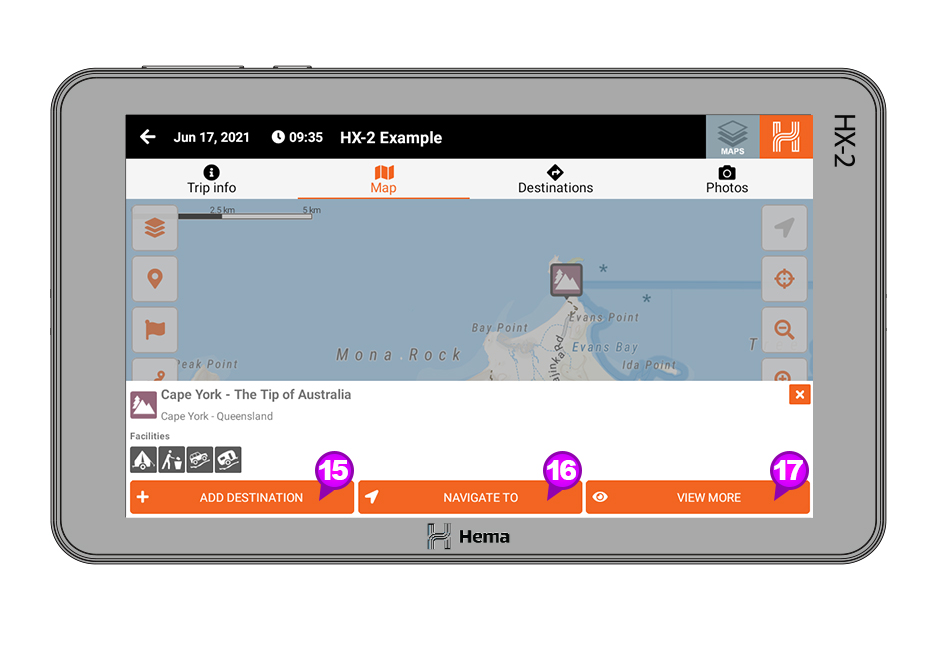 If you click on Navigate To, your HX-2 will open the On-road mode to give you turn by turn directions to that destination.Clicking View more will bring up more detailed information about that POI.
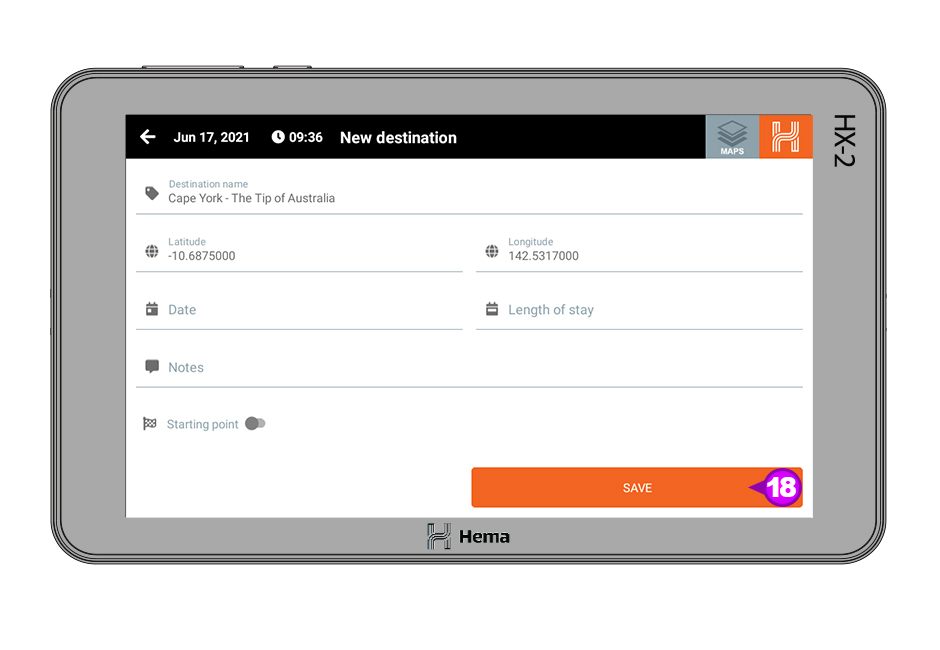
Step 13
For this example we will click Add Destination.When you click on the Add Destination you will get the new destination page but you will see the title will already be filled in.
To add this destination please click Save [18].
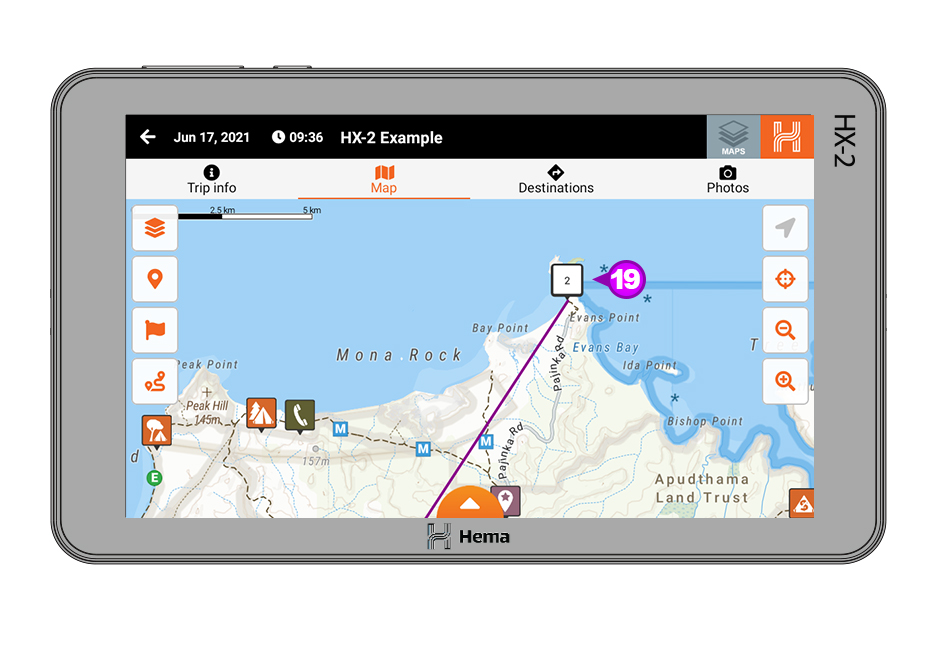
 Step 14
Once you have clicked save you will see the destination has been added with a 2 icon [19].
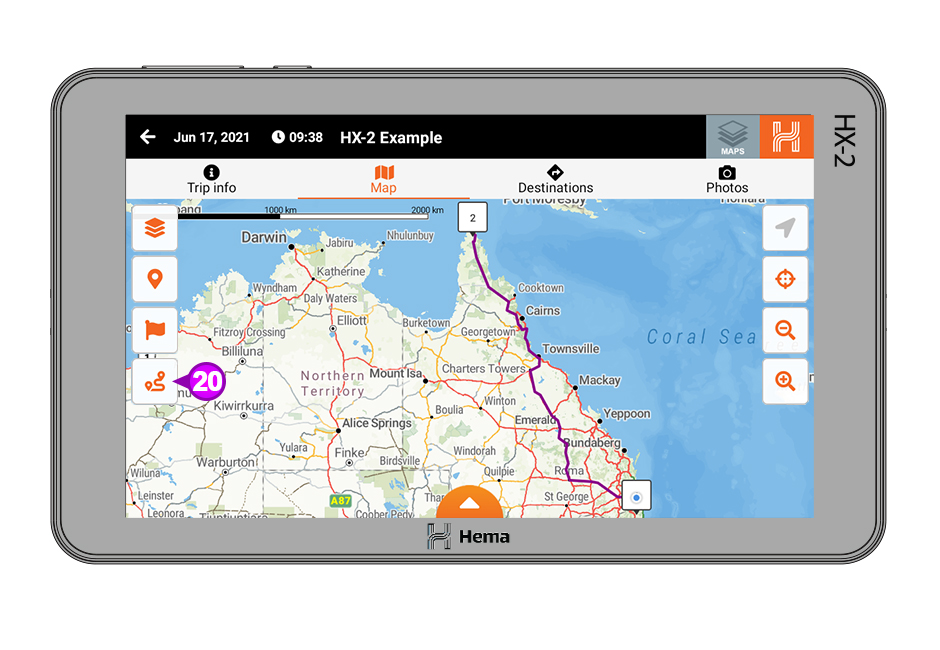
 To see the entirety of your trip, click the Zoom to fit icon [20] and you will be shown the whole trip.
You can add multiple destinations to any trip. The only limitation is the trip length which cannot exceed 11,000 kms.
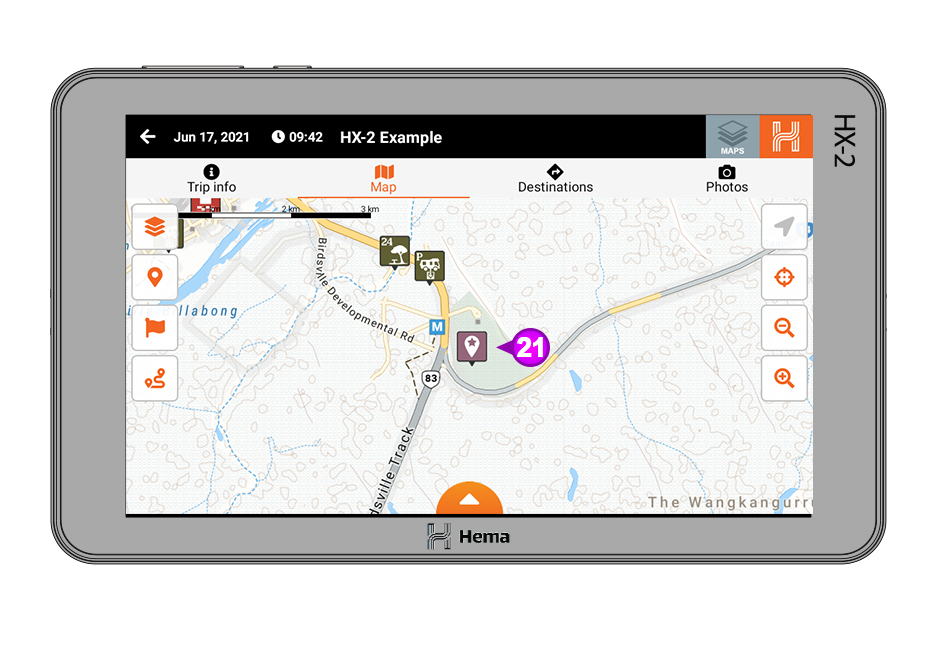
 Step 15
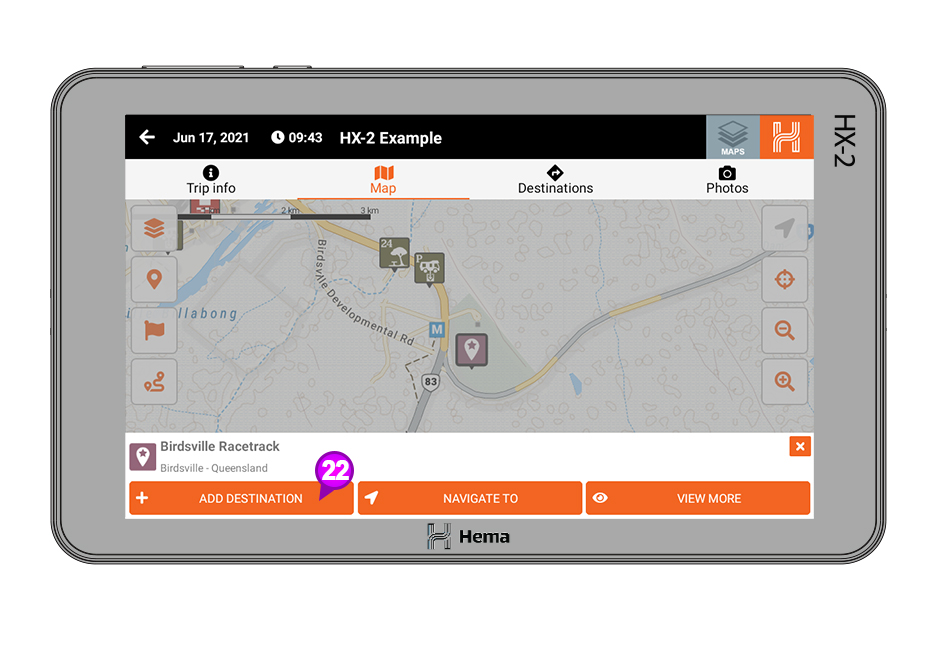
To add another destination we follow the same process. For this example we will choose the Birdsville Racetrack [21].
 Step 16
Once you select the destination, click Add Destination [22] from the options at the bottom of the page.
 Step 17
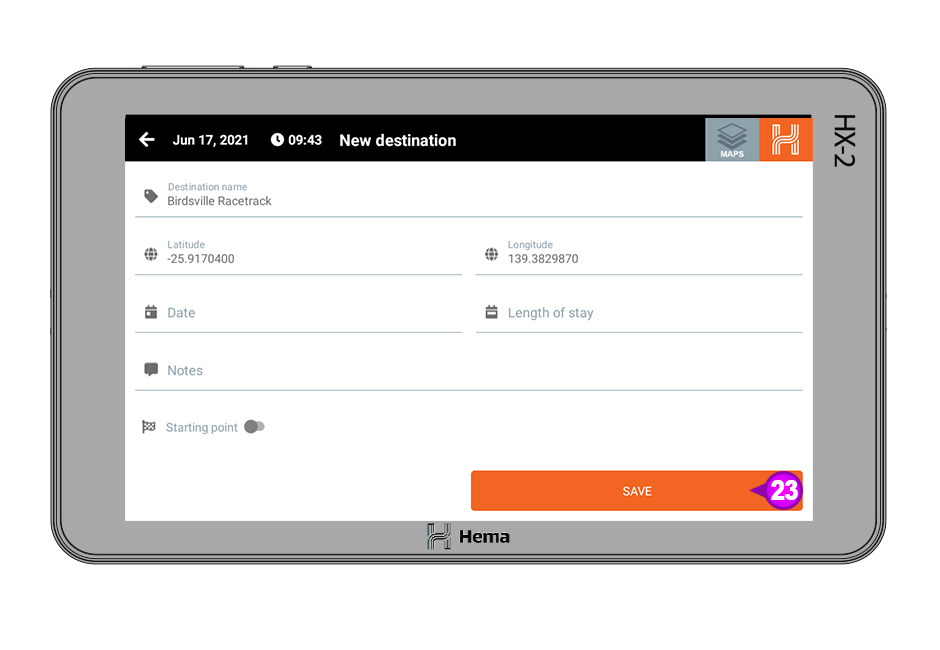
When you're happy with the destination information displayed, then click Save [23].
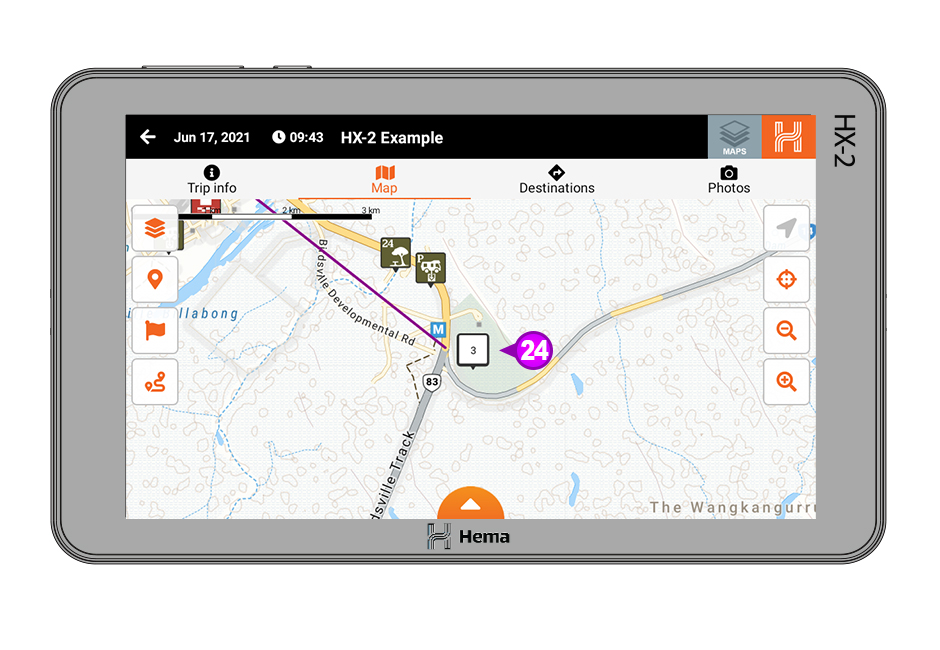
 Once you have clicked save you will see the destination has been added with a 3 icon [24].
 Step 18
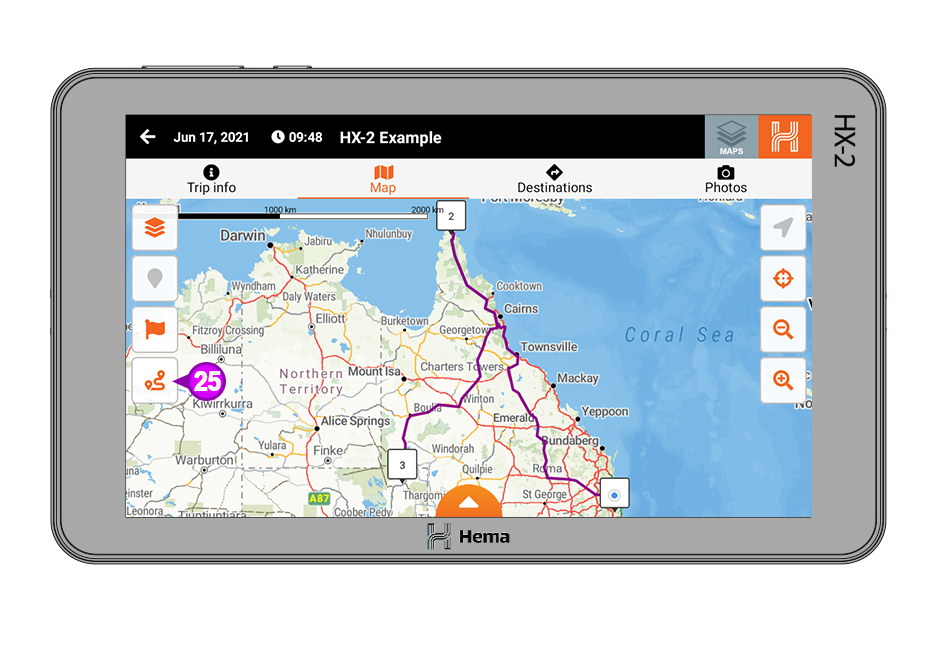
Click the Zoom to fit icon [25] and you will be shown the whole trip and you will see all three destinations.
 Step 19
If you like the destinations in a different order, you can select the Destinations [26] page.
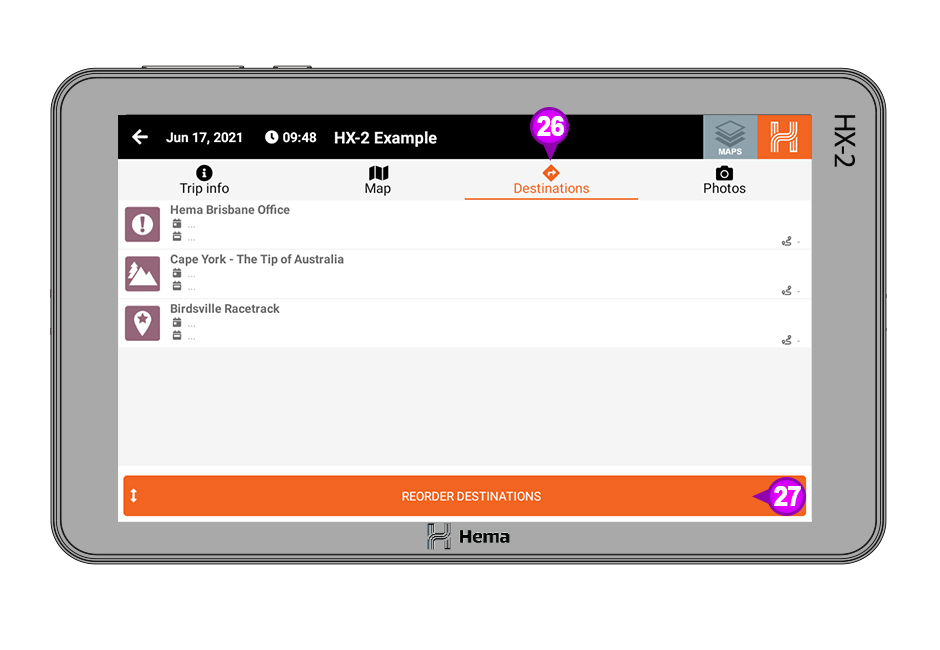 On the destinations page you will see the three destinations that have been added.
At the bottom of the page you will see the Reorder Destinations [27] button.
Step 20
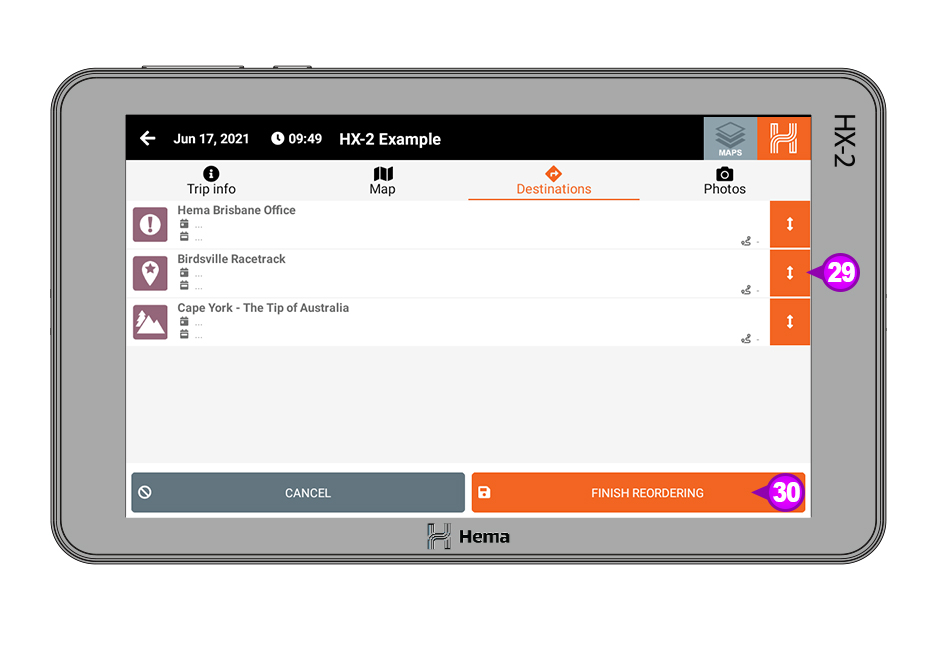
You can now reorder the destinations in the trip by clicking on the Reorder Destinations button and each of your destinations will then have arrows on the right of the destination [28].
 Step 21
You can re-order your destinations by clicking and then dragging the destination to its desired spot in the list [29].
Once you have the destinations in the desired order, click on the Finish Reordering [30] button
 You will then see that the destination list has been reordered.
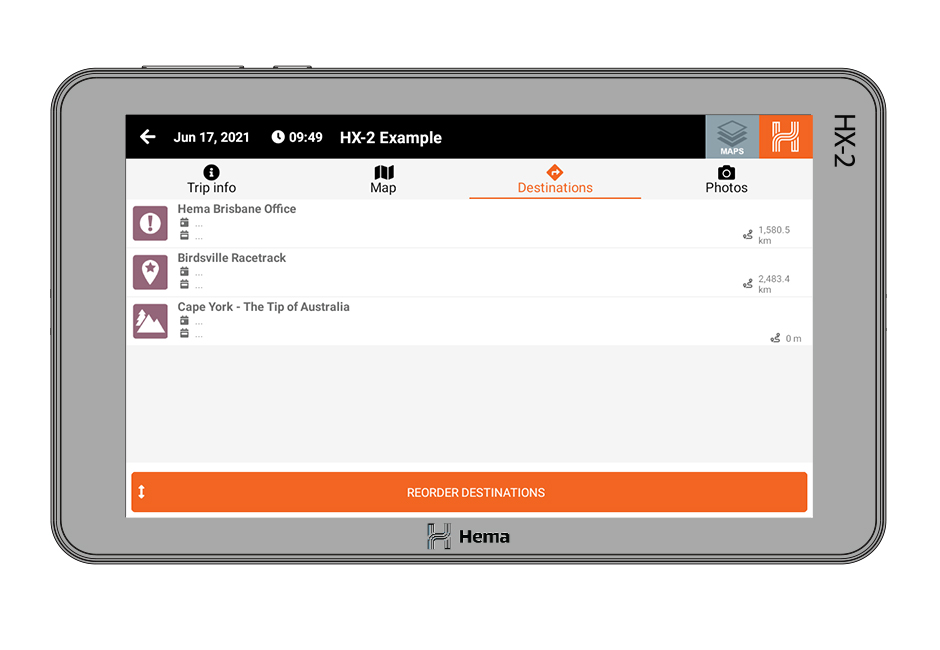 Click the Zoom to fit icon [31] and you will see all three destinations in the new order.
 Step 22
You can also edit or remove destinations from the Destinations page.
When you select one of the destinations you will be given five options for that destination.
32 Show on Map
33 Navigate To
34 More Information
35 Edit
36 Delete
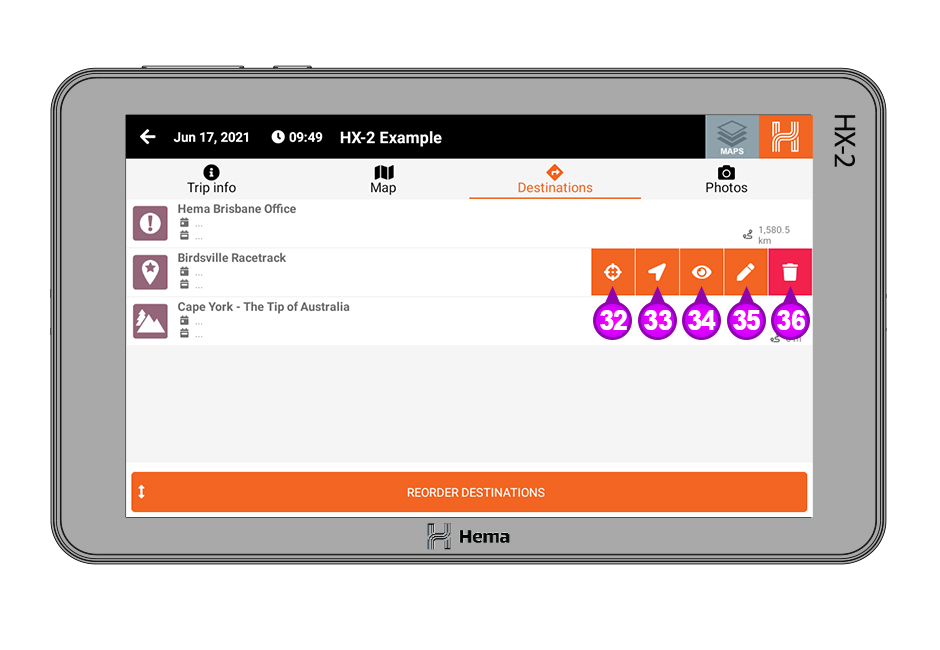 To remove the destination from the List click on the Delete [36] button.
Step 23
You will be prompted to make sure you want to delete the destination. If you wish to proceed click OK [37].
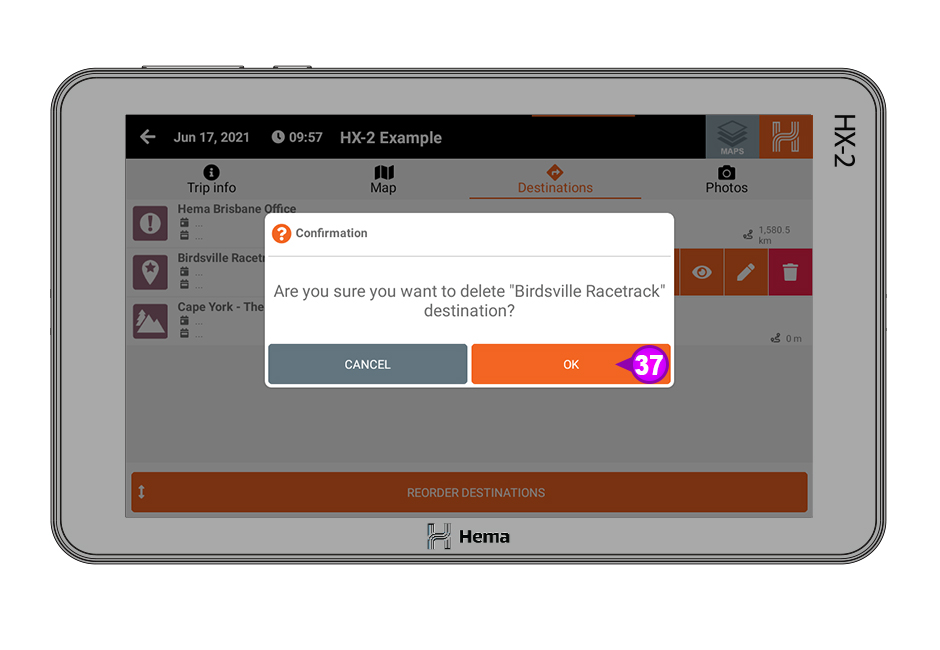 Once you click OK you will see that the destination has been removed from the destination list.
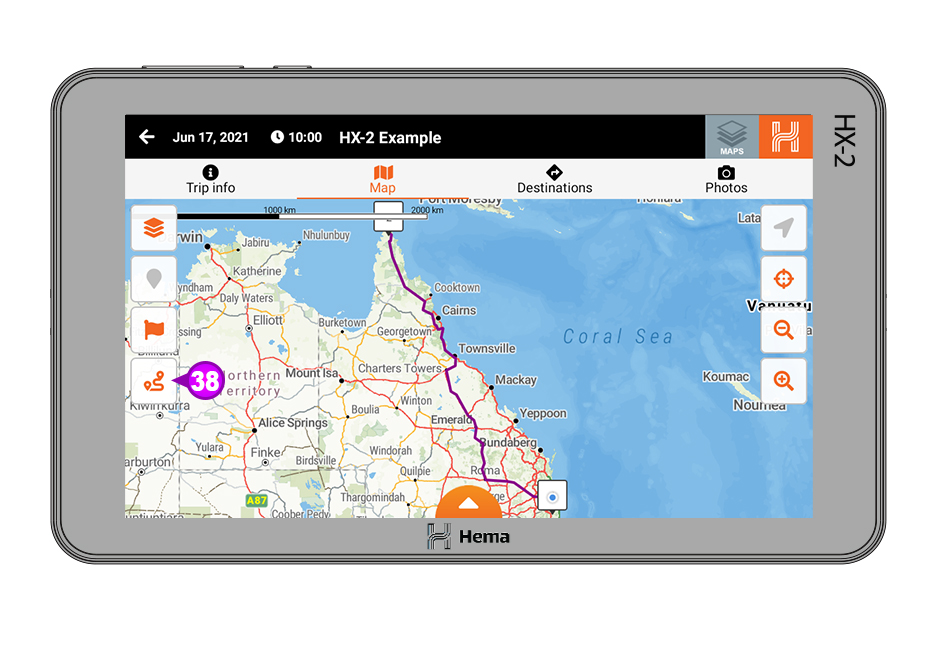
 Click the Zoom to fit icon [38] and you will also see that the destination has been removed and only two remain.
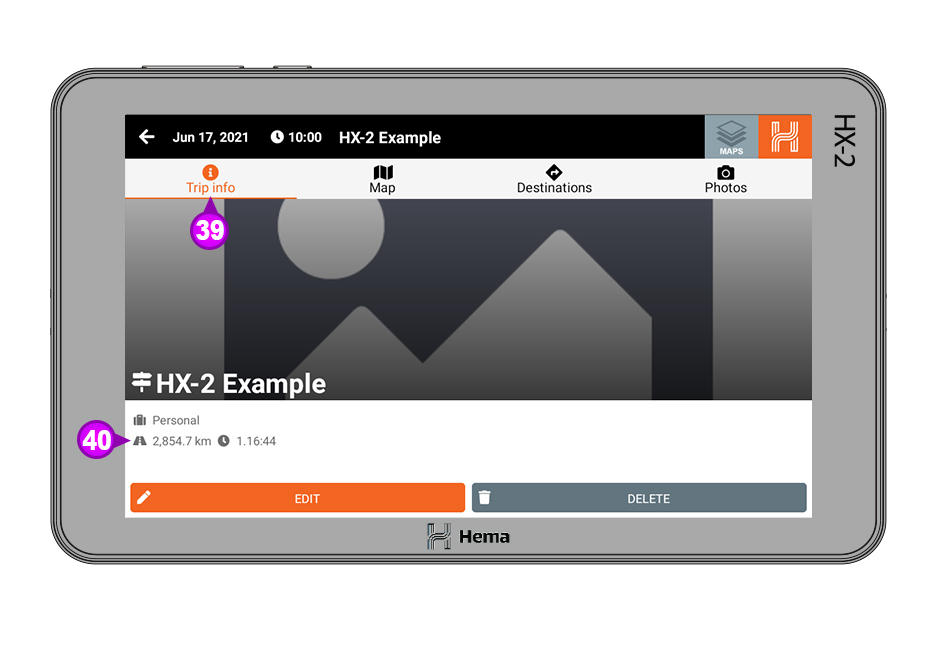
 You can also see the total distance for the trip by clicking on the Trip Info [39] page and then looking under the trip name for the trip statistics [40].
 If the steps above do not resolve this issue, please contact our technical support team for further assistance.
You can submit at technical support ticket via our website at http://kb.hemamaps.com/kb-tickets/new